No one shows the full Google Ads setup for Shopify, covering every campaign type, account setting and feed optimization that actually drives sales, all in one place. I’ve been running Google Ads for Shopify brands for over 10 years.
In this 2026 Google Ads tutorial, I’ll build a brand new account from scratch so you can follow along and apply it to your own store. If you’re running ads already, you’ll see how to grow your account.
I’m going to show everything: search, shopping, Performance Max, remarketing, and more. I’ll show you how to research, use AI, write ad copy, gather keywords, set up a well-optimized feed, and configure account settings so you grow your store.
Get More Sales From Google Ads
Download our free Google Ads checklist to set up every campaign type correctly and start driving more sales for your Shopify store.
Setting Up a New Google Ads Account
First thing we’ve got to do is get an account. Use the promotional code if you can to receive a $600 offer from Google. Simply claim the offer, create the account, and it’s instant money. If you work with a Google partner, they will often be able to get you extra credit as well.
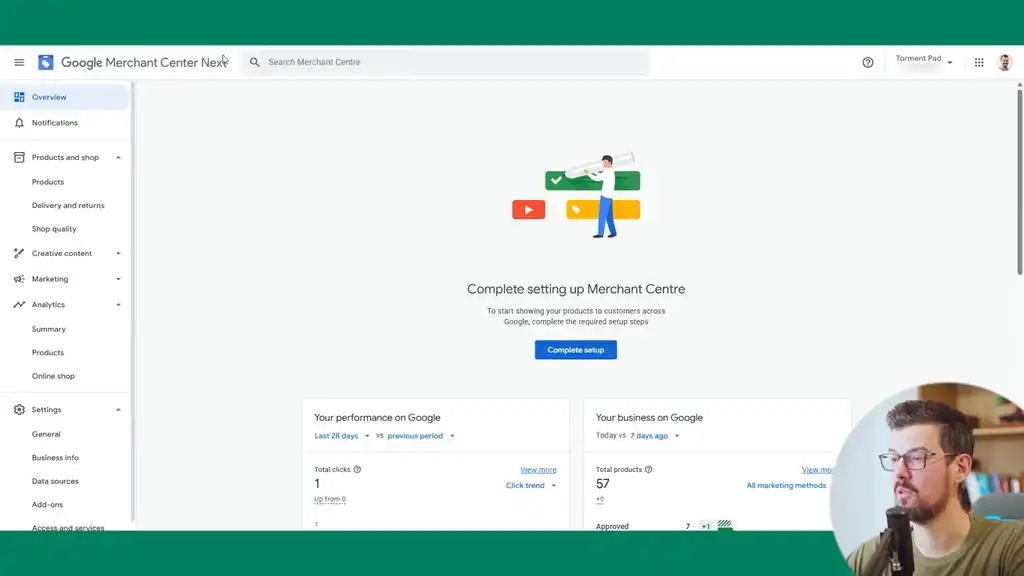
The brand I’m creating the account for is called Torment Pad. They sell acupressure mats and acupressure pillows and we’re going to create the account for that. We’ll dive more into the particulars of that brand soon.
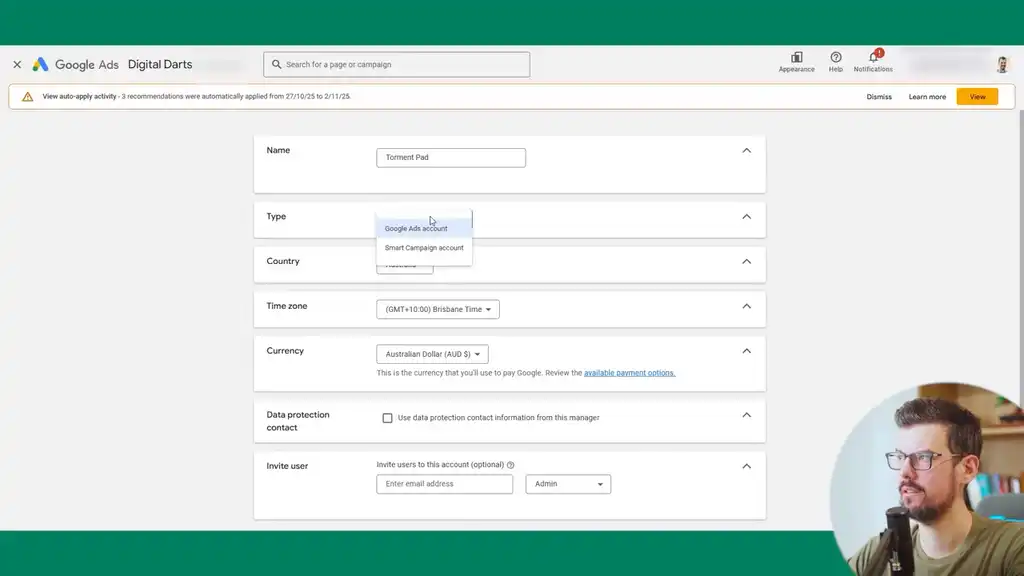
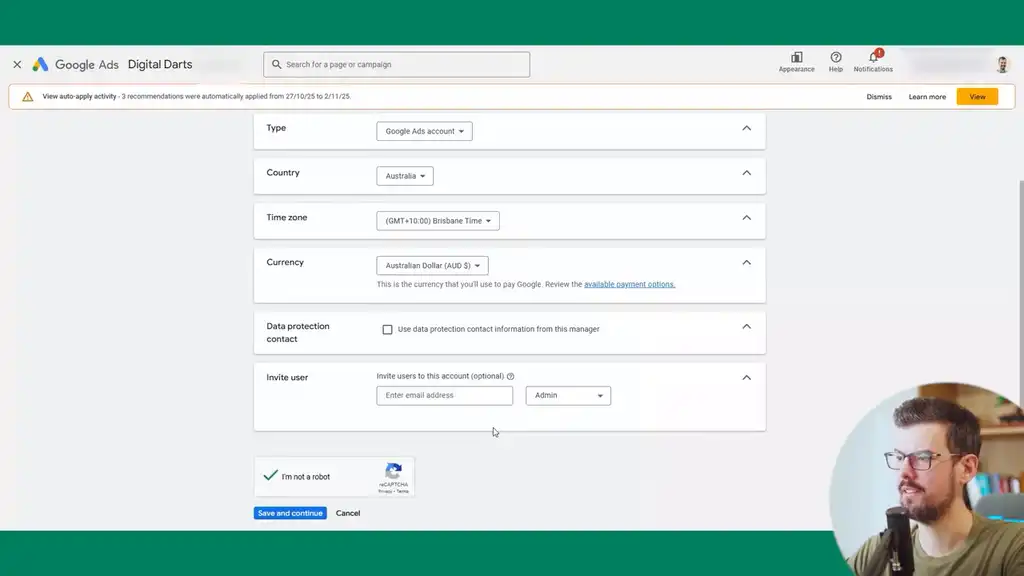
For account type and country, set it to where you primarily ship to as it doesn’t really matter much. The time zone matters because of reporting, so set it to the time zone you’ll primarily work in. If you’re in the EU, you’ll need to set a data protection contact as well.
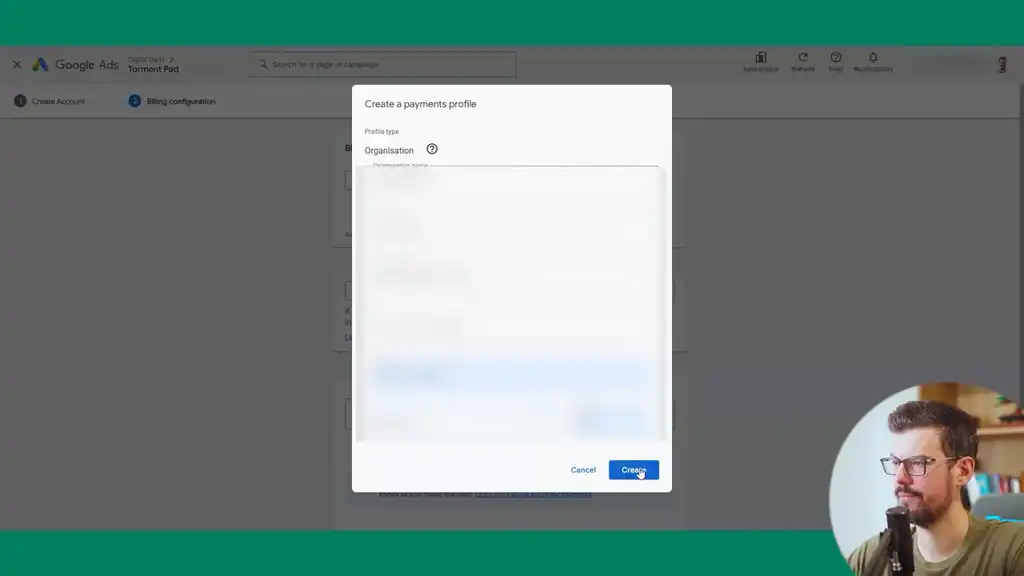
Once the account is created, set up the payment profile and enter a credit card. As part of Google Ads, you should verify your account which is part of legal requirements.
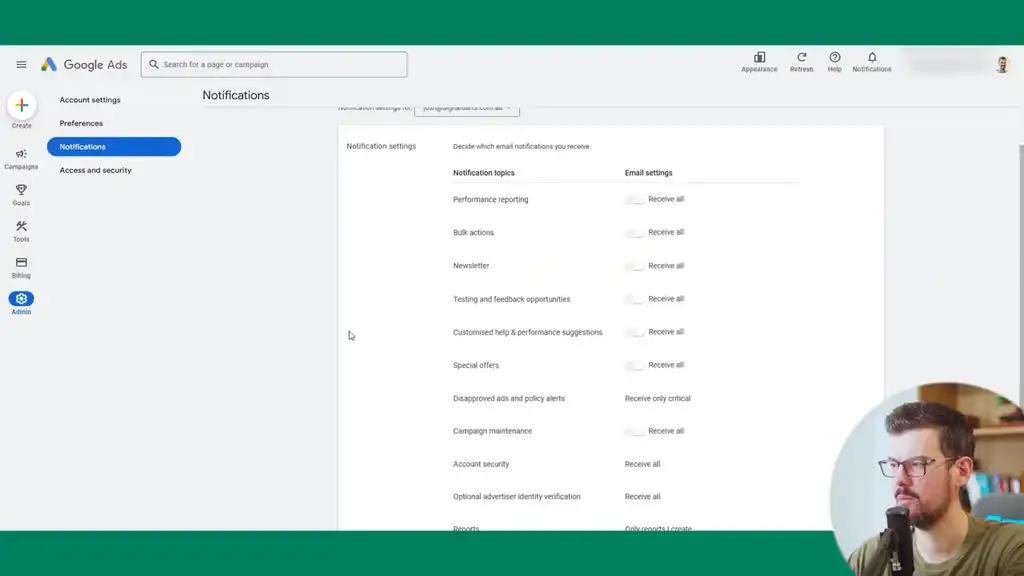
Notifications and Preferences
The first thing to do is go to notifications. I don’t have many of these enabled apart from what’s pretty much default. You may need to disable bulk actions. The important ones are critical disapproved ad alerts and policy alerts since you want to know if an ad has been disapproved. Billing alerts are also critical. Keep it simple for now and customize as you see fit.
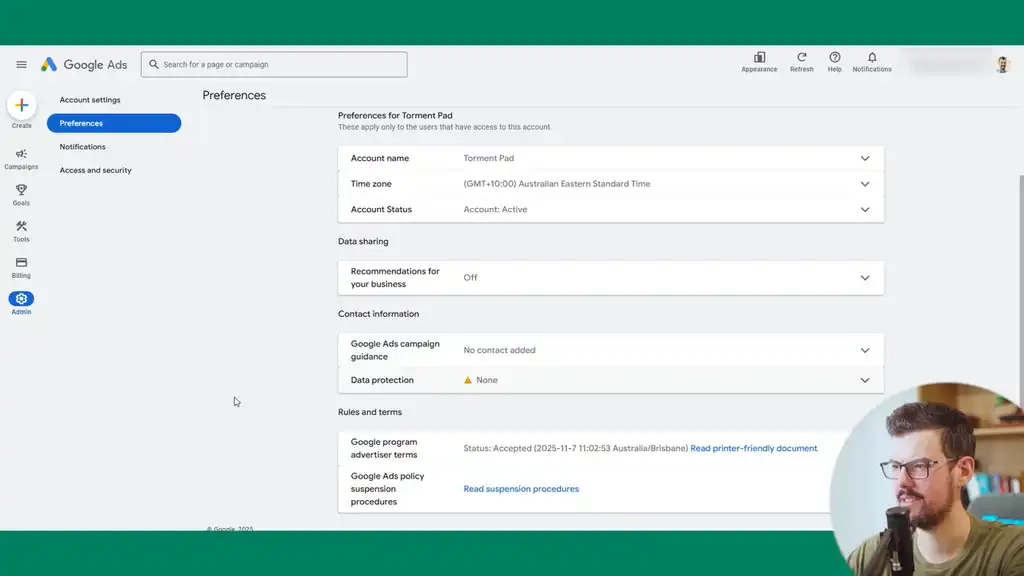
In preferences, starting with the account level settings: turn data sharing off. You don’t need to be giving Google what it doesn’t need. Also turn off Google Ads campaign guidance as you’ll get reps contacting you and nothing good comes from a Google Ads rep.
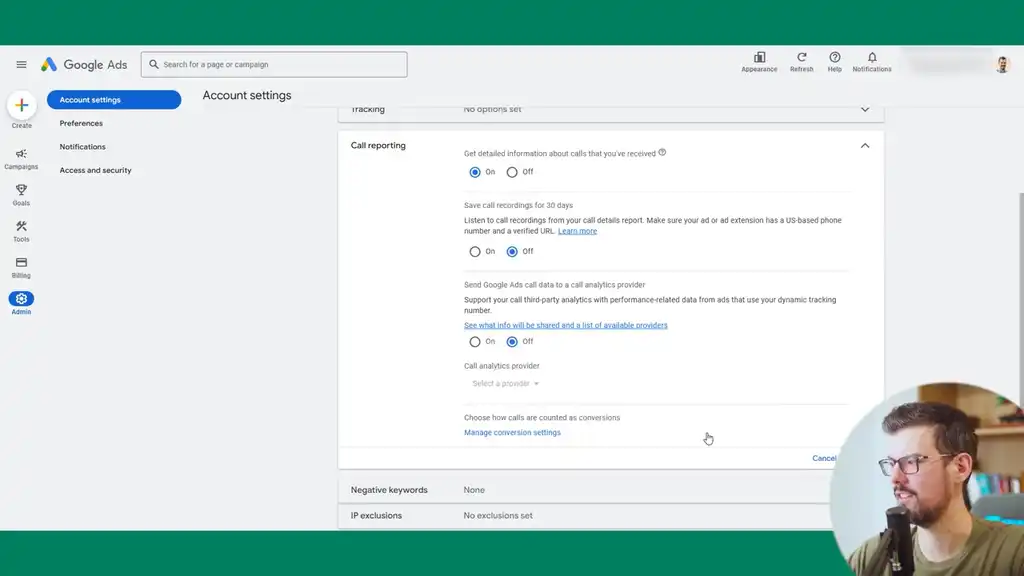
Account Settings: Time Zone, Auto Tagging, and Call Reporting
The time zone setting needs to line up with when you manage your account and with your Shopify configuration time zone. That way you know when the reporting lines up. Otherwise you can get reporting discrepancies that confuse you when there are three-day differences.
For auto tagging, leave that on. It’ll prepend the Google Click ID to all URLs so you don’t have to worry about that, which is a big life saver. If you have a phone number, I suggest setting up call reporting.
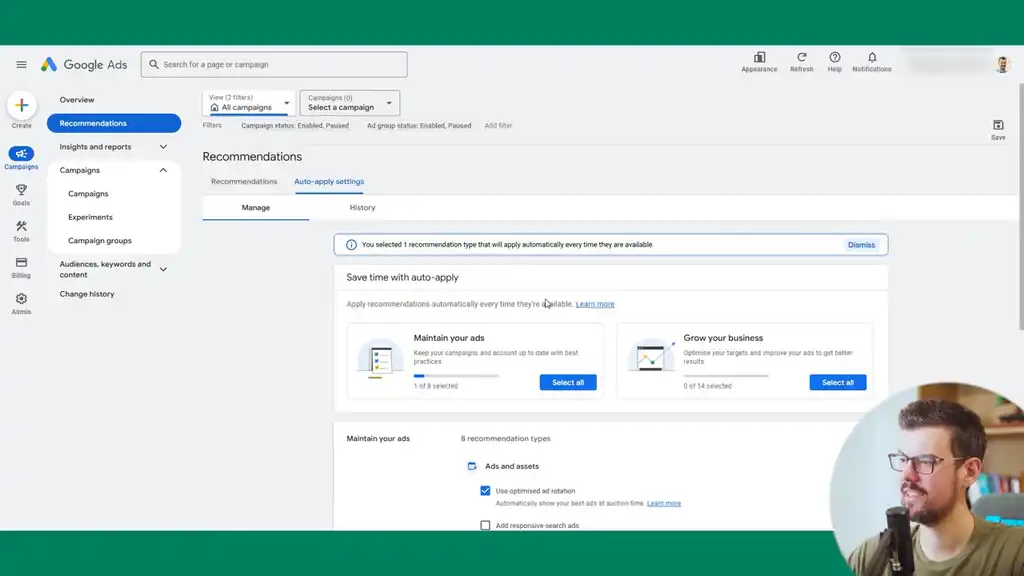
Auto Apply Settings
For auto apply settings, they’re currently all off by default which is a nice feature as opposed to what they used to do with enabling them by default and causing chaos. Don’t enable any of that. The only one I suggest you enable to begin with is Use Optimized Ad Rotation. This is a good thing for all accounts to have set up.
Over time you can also enable ‘remove redundant keywords, remove non-serving keywords, and conflicting keywords’. These can help manage search campaigns a little bit better.
Customer Match List: Critical for AI and Machine Learning
The other account setting you need to set up is the customer match list. This is critical for AI and machine learning in accounts because you’re feeding your customer data and Google will get a lot better at being able to recognize who your customers are based on that data. If you have over roughly 50,000 customers, it’s worth having a more targeted list of your VIPs based on revenue amount and the recency of that data. For example, customers in the past two years.
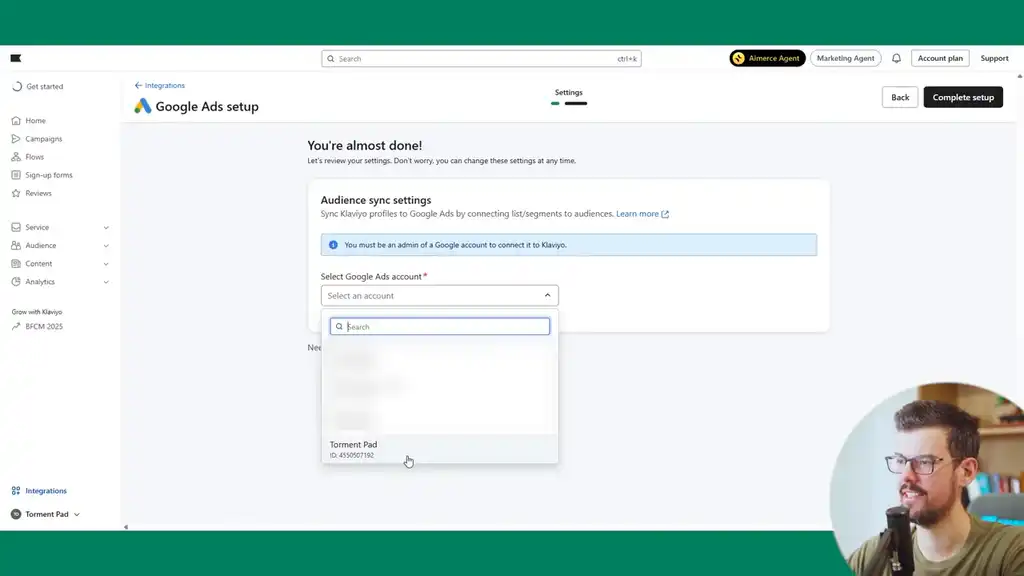
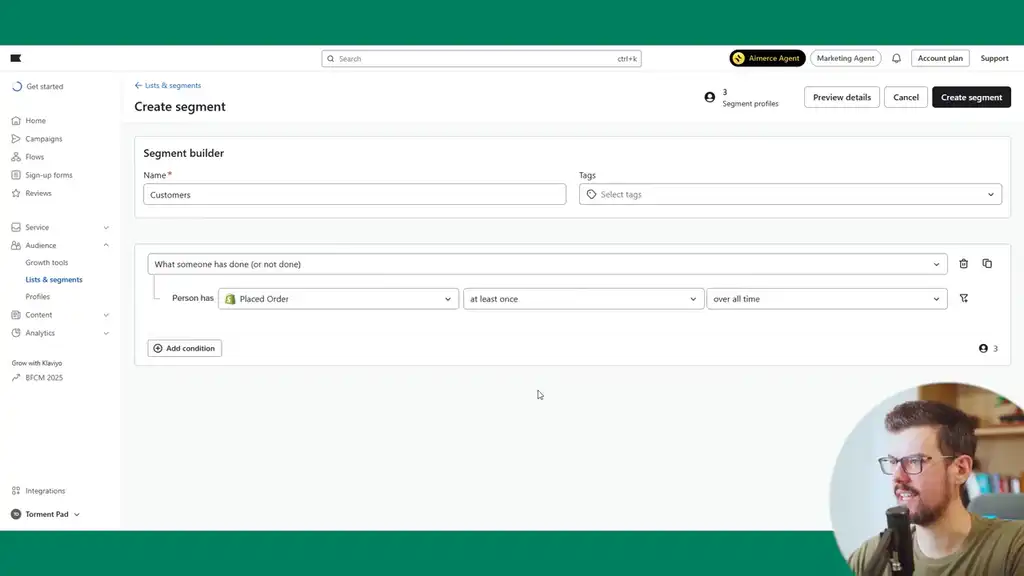
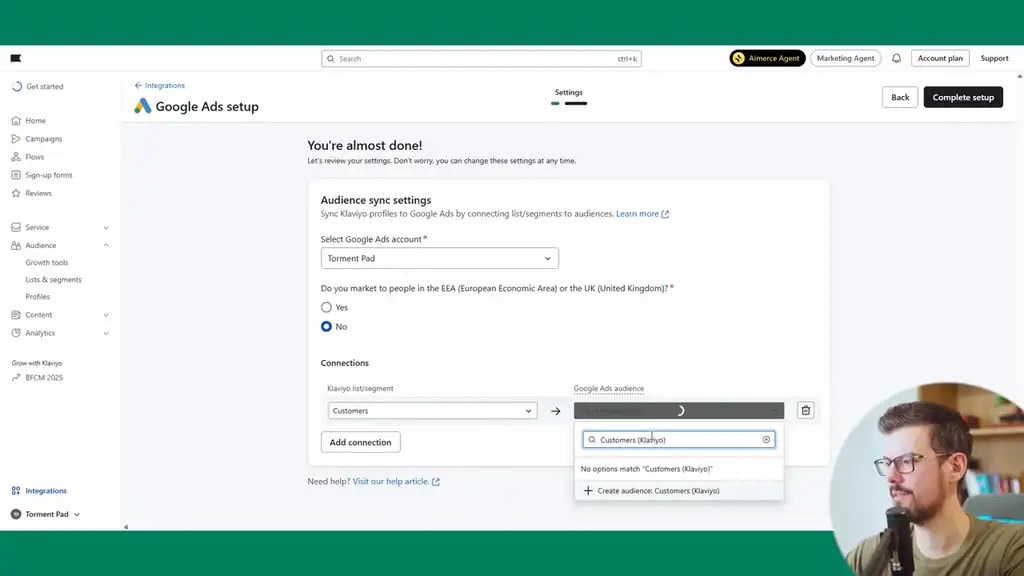
The best way to set up customer match for Shopify brands is in Klaviyo. Go to integrations, find the Google Ads integration, and select the Google Ads account. Create a customer segment for ‘placed order at least once over all time’ and sync it up. I suggest including “Klaviyo” in the name so it’s clear what’s being synced and where the data comes from, because you know it’ll be up to date.
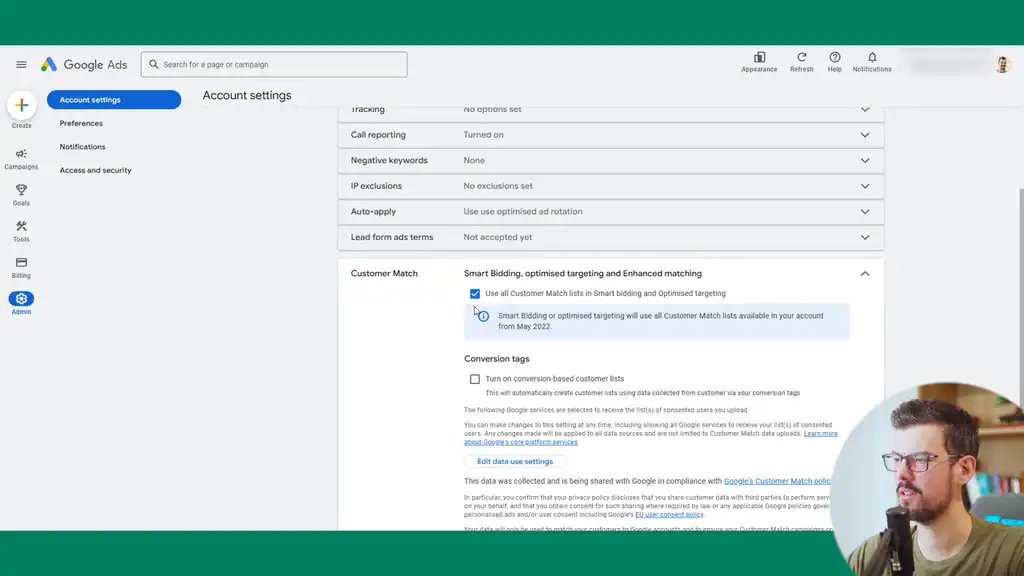

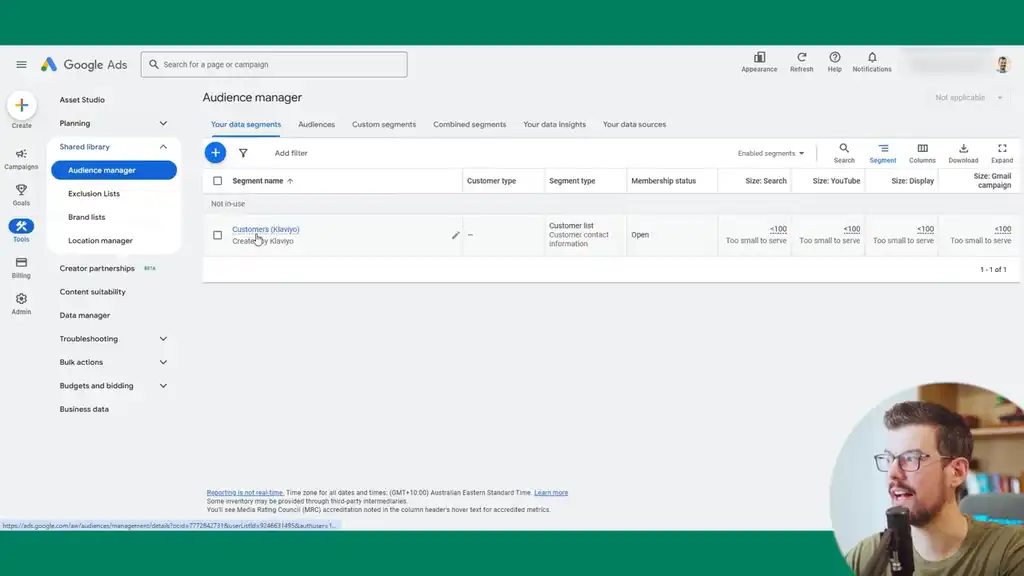
This list will now appear in Shared Library > Audience Manager and will be synced in Google Ads. As it builds over the next few hours with all customer data, Google can optimize from it. This custom list can also be used as an audience signal for Performance Max campaigns.
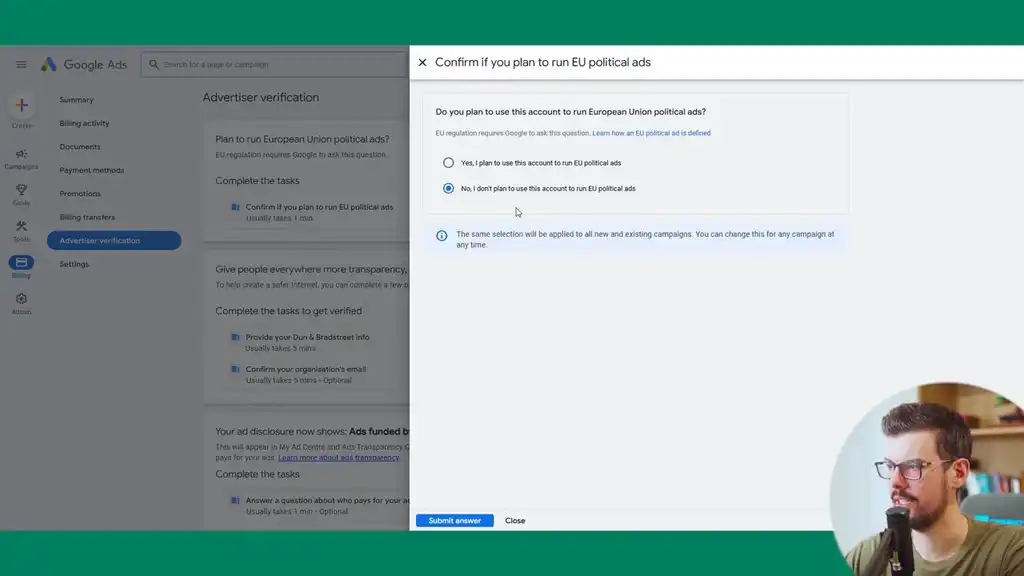
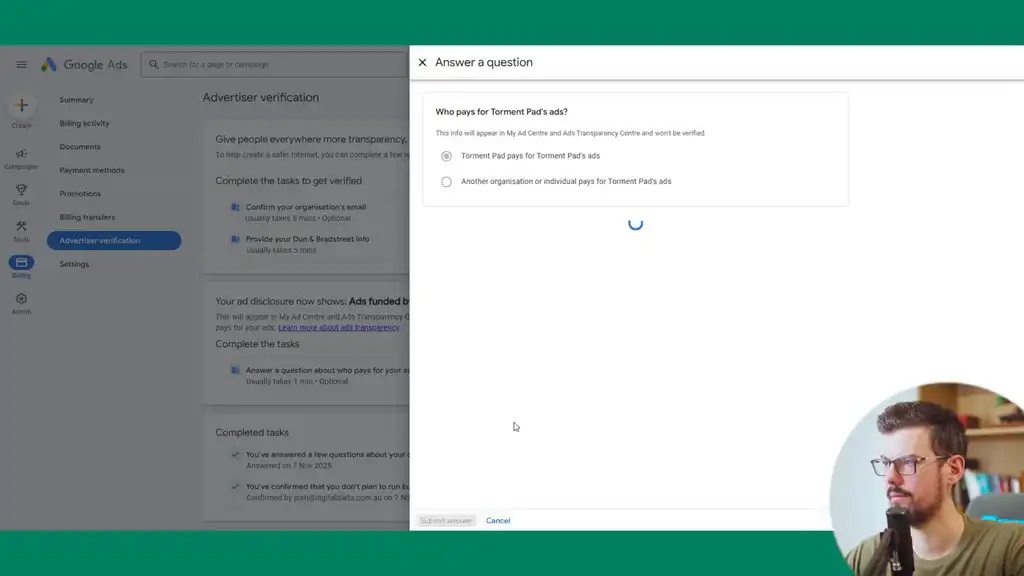
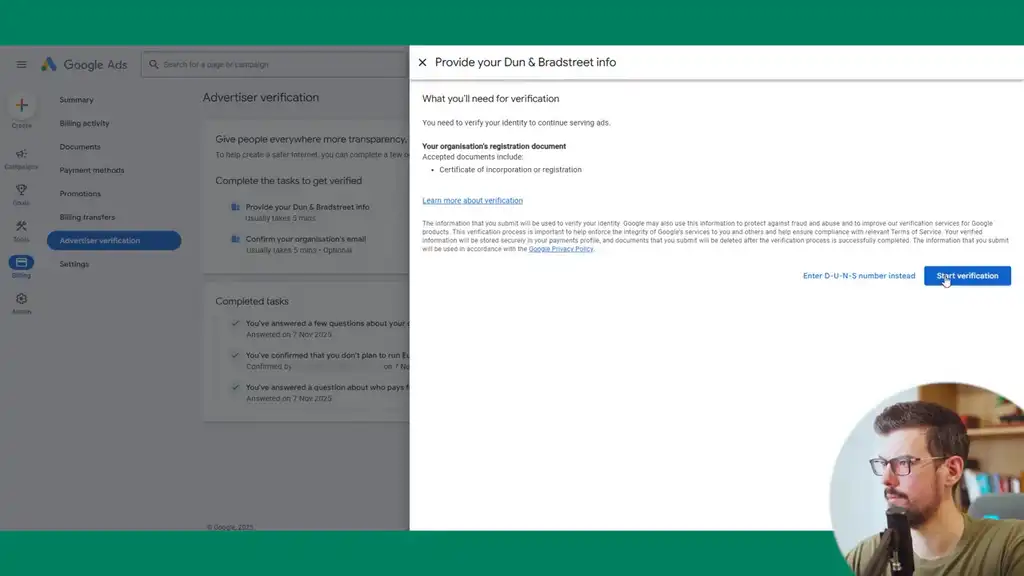
Advertiser Verification and Billing
Always check under Billing > Advertiser Verification. Select the business, fill in the name and address, and that’s all that’s needed. With advertiser verification done, you’ll save yourself headaches.
The Hidden Setting That’s Destroying Ad Accounts
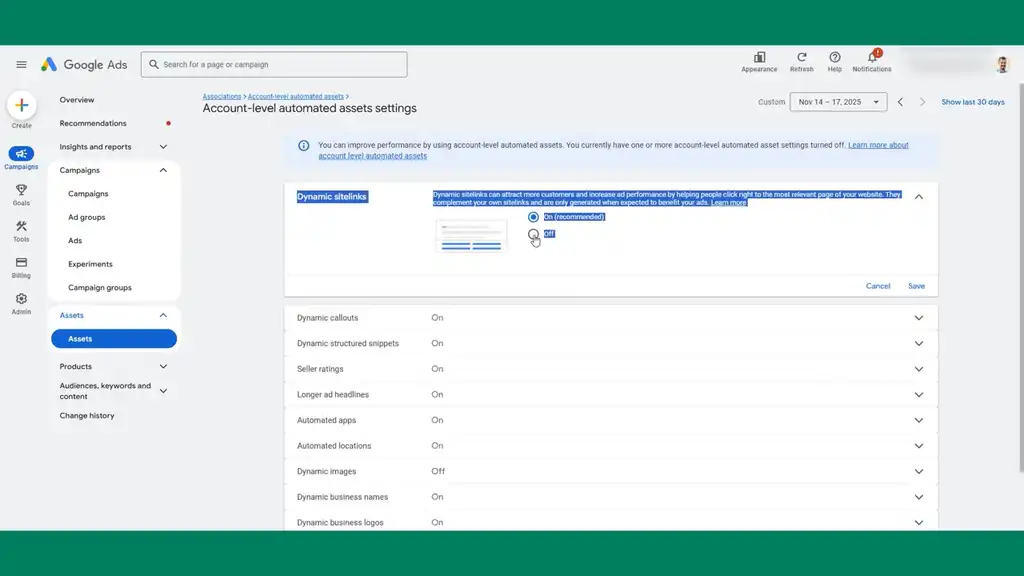
There’s one setting I almost forgot to share which just shows you how hidden this is. It’s actually destroying a lot of ad accounts that I audit for e-commerce brands. Go to Assets, then More (account level automated assets), and then you have to click More again.
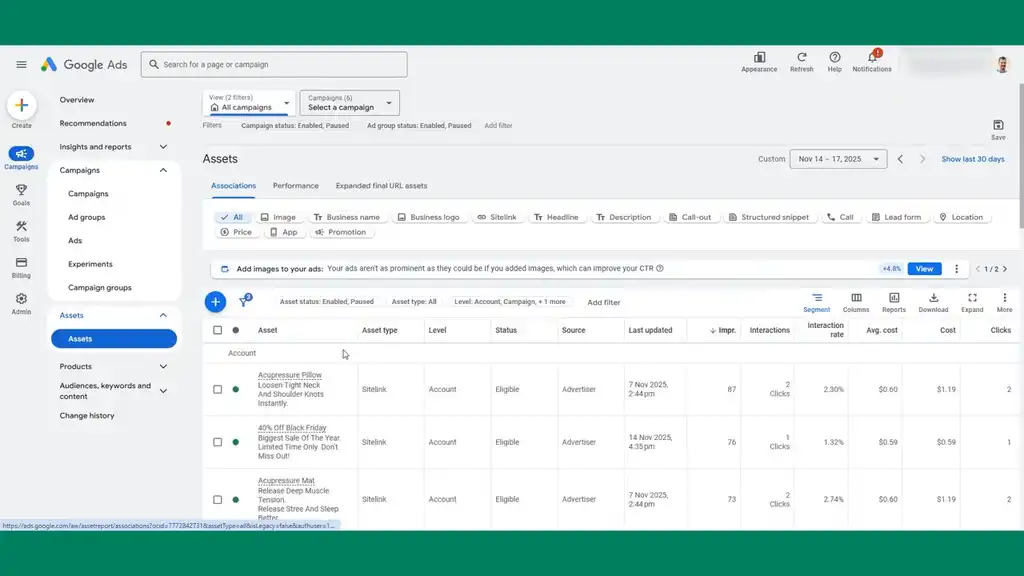
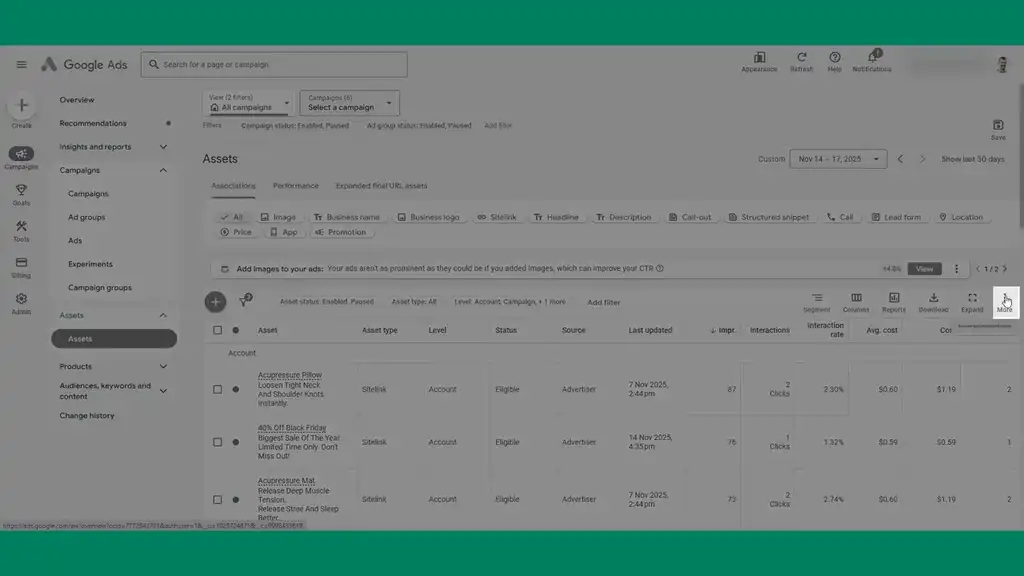
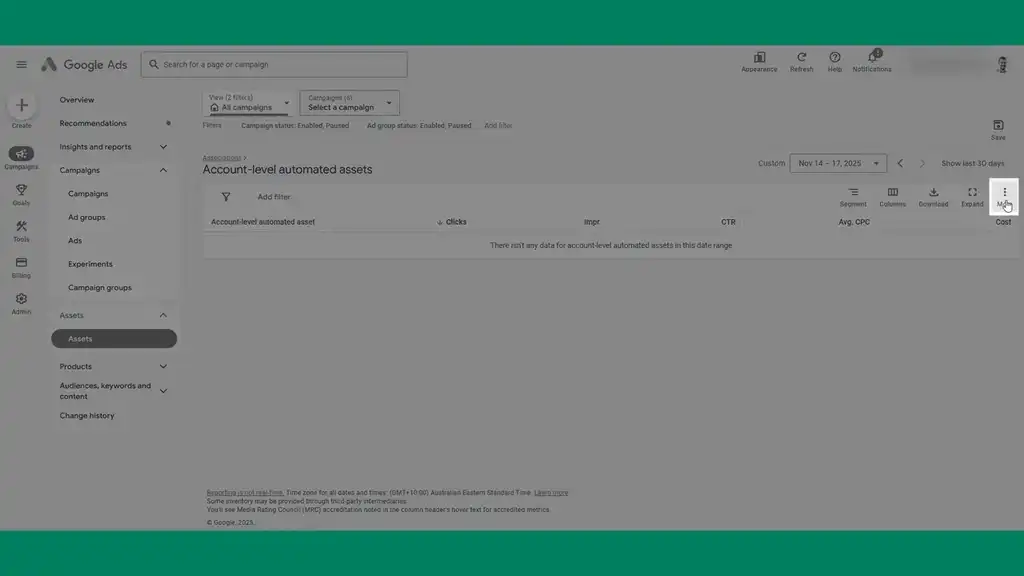
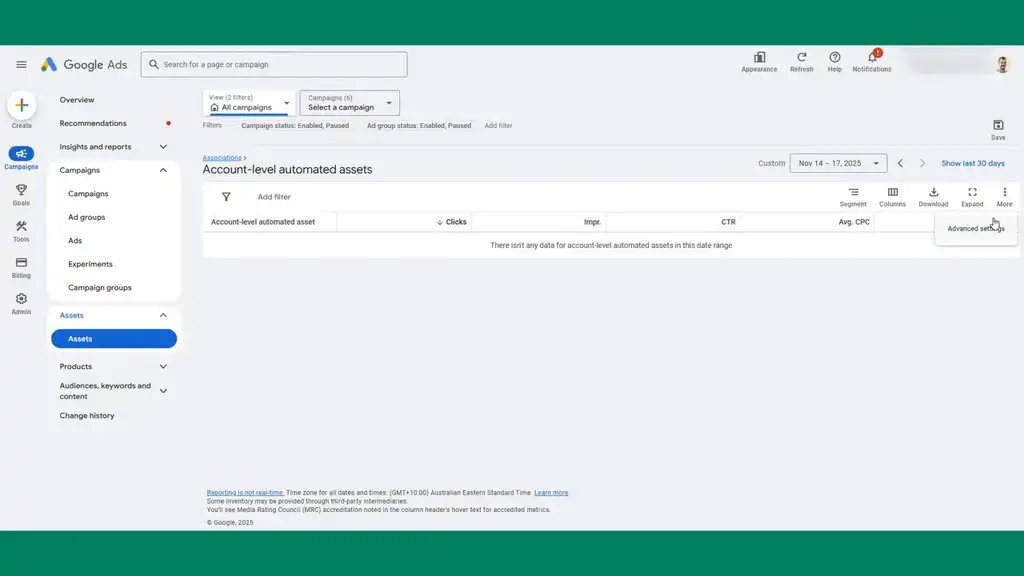
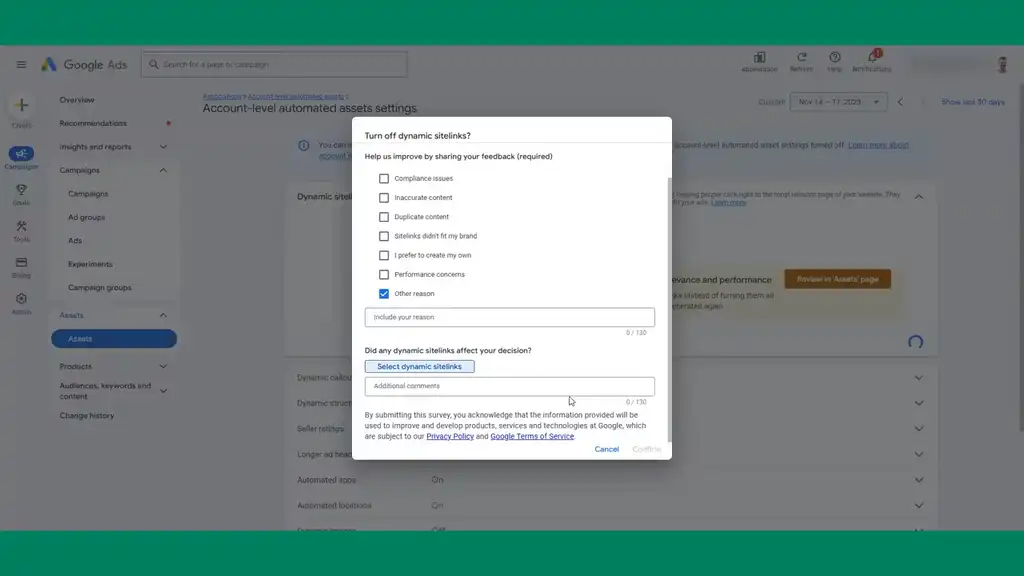
Go to Advanced Settings and you’ll see the account level automated asset setting buried in the middle of nowhere. Disable the dynamic sitelinks. It doesn’t matter what reason you select for turning off as Google just uses that to feed information for why you’re declining it.
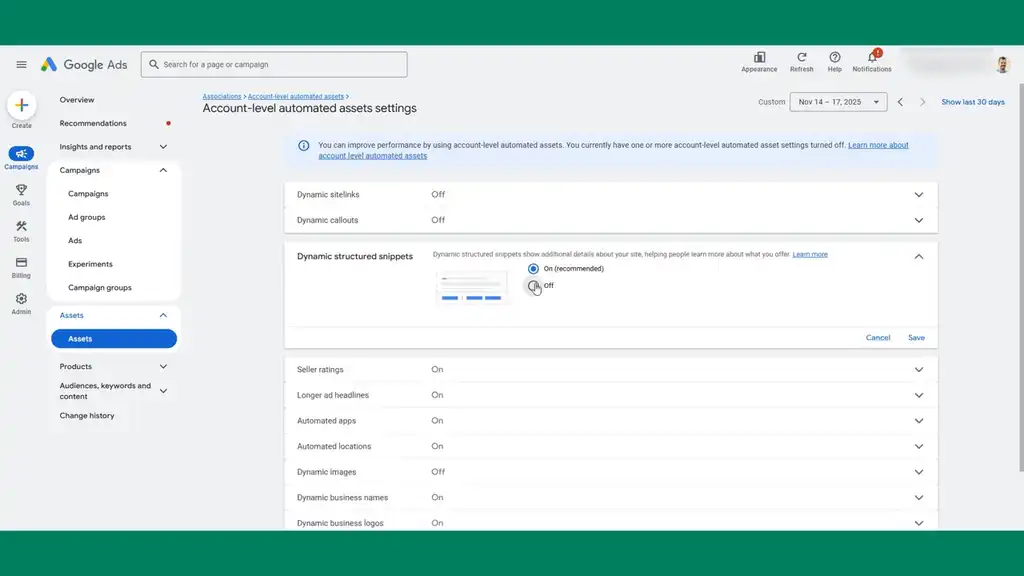
Go through each one: dynamic callout, dynamic structured snippets. I suggest leaving seller ratings on. Turn everything else off. You don’t want Google creating automated account assets throughout as you’re going to be creating these yourself step by step through this tutorial, and it gives you control which gives you better performance.
Google Merchant Center Setup for Shopify
The first thing we want to get set up is a shopping campaign. To do this, I’ll show you everything you need to consider for Google Merchant Center. If you don’t have one, go to merchants.google.com and set one up. Even if you have an existing Google Merchant account, I suggest you cross-check your settings against everything I’m sharing here. There’s a lot of stuff to consider and a lot of hidden settings.
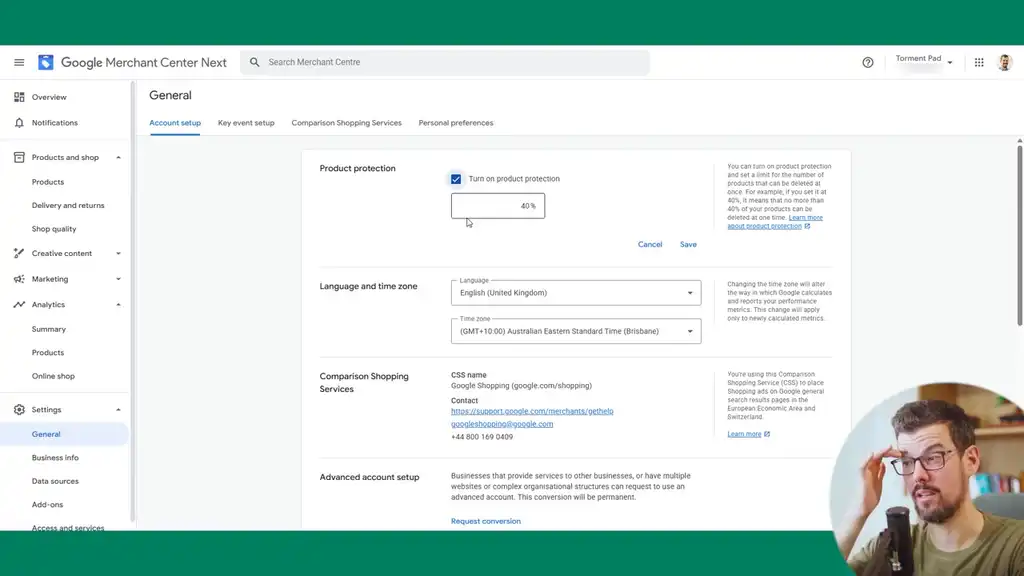
General Settings and Product Protection
In Settings > General, I suggest turning on product protection, particularly for large SKU stores, because this will ensure that if products suddenly disappear from your feed, you’ll get alerted. A 20% threshold can be fine for most stores. Line up the time zone setting with your Google Ads account.
If you’re in the EU region, setting up a comparison shopping service is the easiest way to get 20–25% cheaper cost per click. I suggest you do that with DataFeedWatch. If you’re advertising in the EU and not doing this, you’re killing yourself. It’s the easiest way to level the playing field by cutting your cost per click by a quarter. That’s massive.
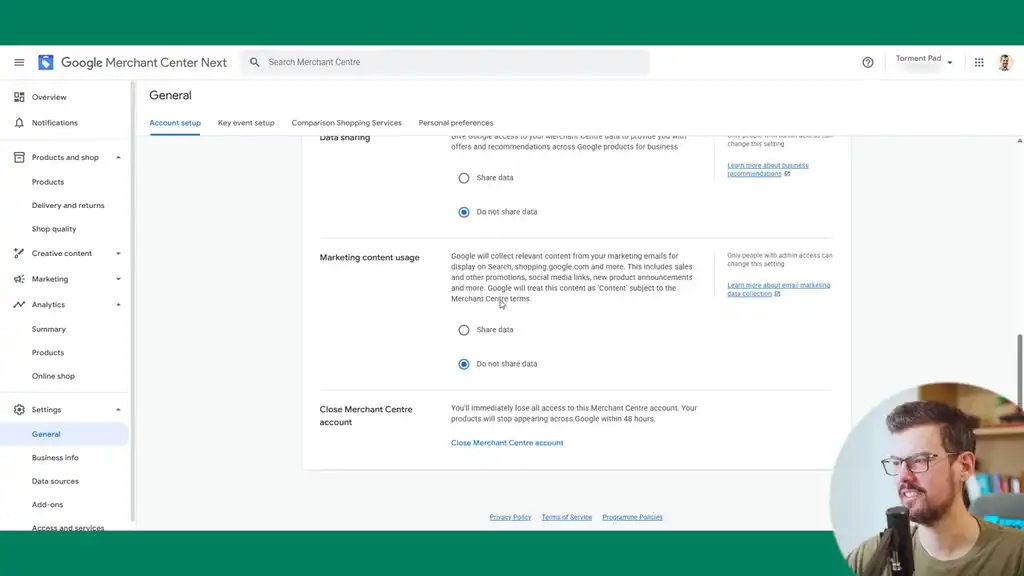
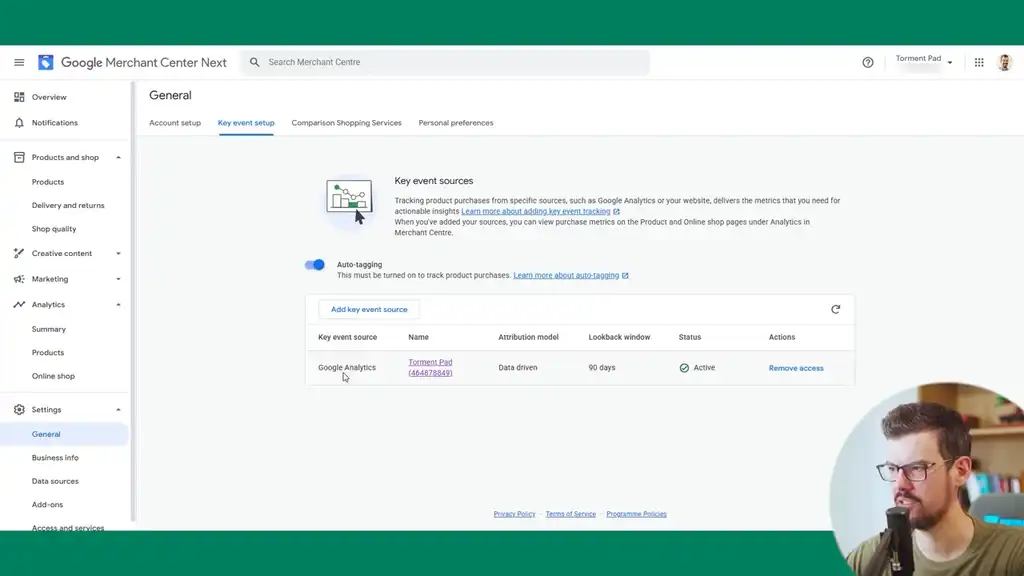
Data Sharing, Key Events, and Notifications
For data sharing, select “Do not share” and “Do not share” for marketing content as well. For the same reason I shared before, just minimize data that doesn’t have to be shared.
In key event setup, link your Google Ads source here. Link up your Google Analytics 4 account, enable auto tagging, and this will include UTM data that gets passed back to GA4, which will provide cleaner GA4 reports. You won’t have to modify your feed URL to contain UTM parameters.
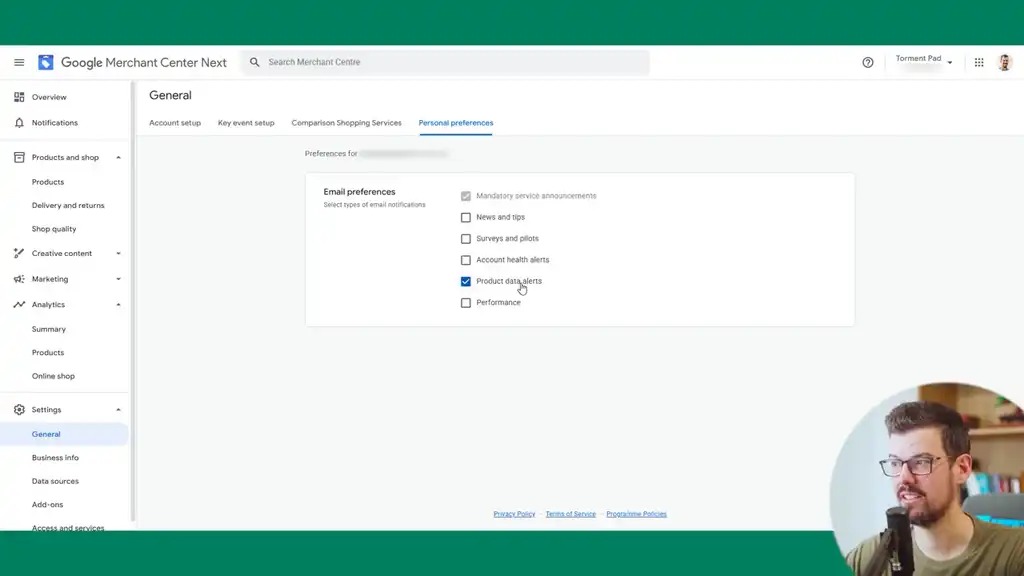
For general notification settings, I suggest enabling product alerts and leaving it at that. You’ll get notified of product performance declines, disapprovals, and problems like that.
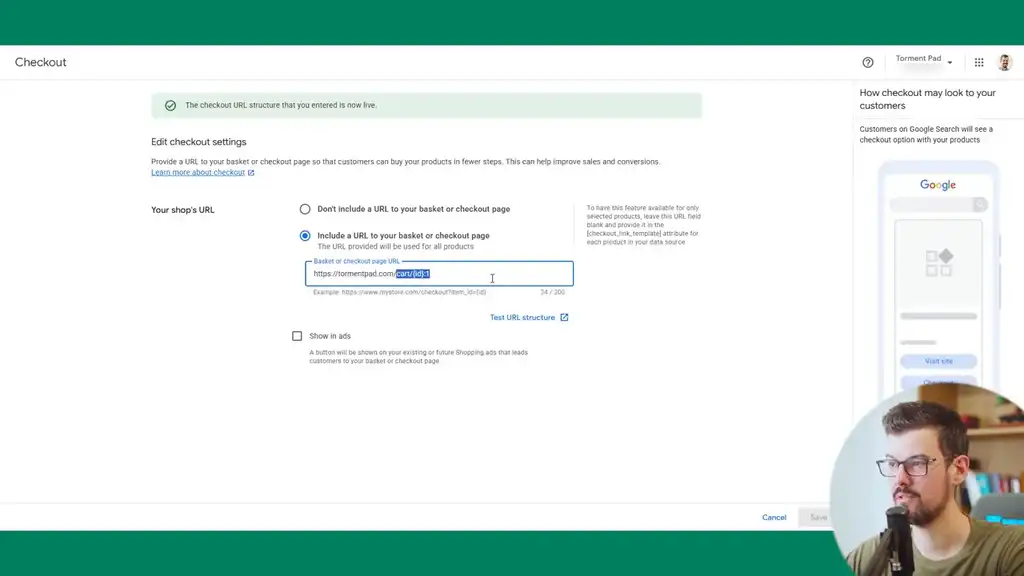
Business Settings: URL Structure, Domain Verification, and Brand Details
Edit your checkout settings with this URL structure: put in the domain followed by /cart and then the ID. This automatically adds items to cart, functional with Shopify’s checkout. If you’re not using Shopify and happen to be following this tutorial, this configuration won’t work the same way.
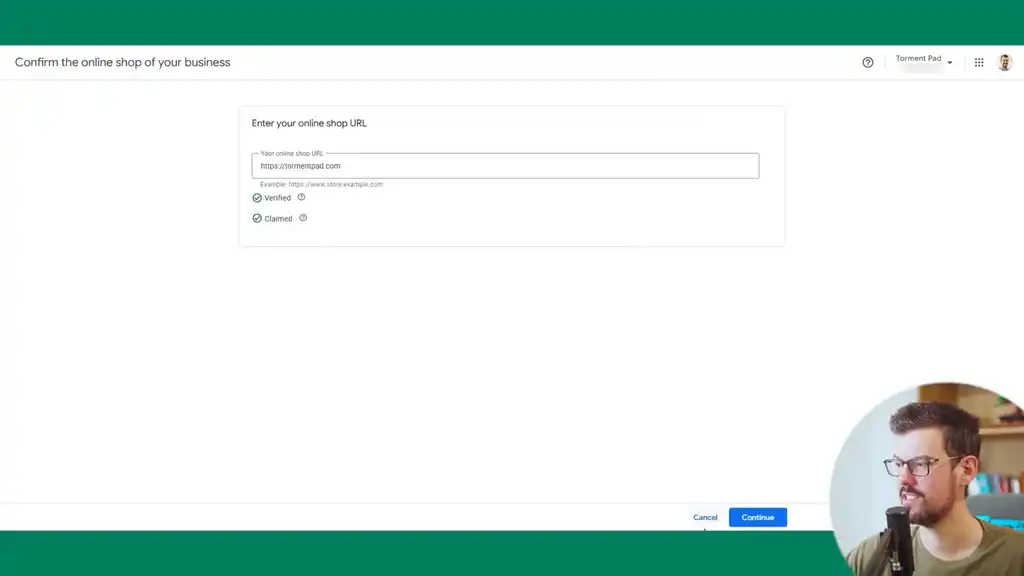
In your online shop, you need to verify your domains which is done through Google Search Console. Only one Merchant Center can claim per domain.
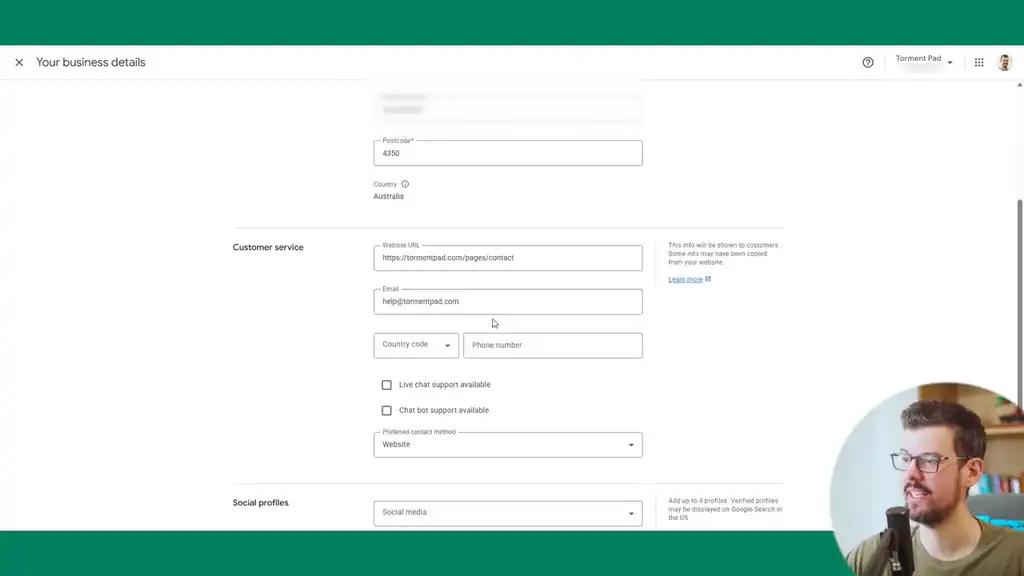
In your business details, fill in contact details as this can help with customer support in Google Shopping.
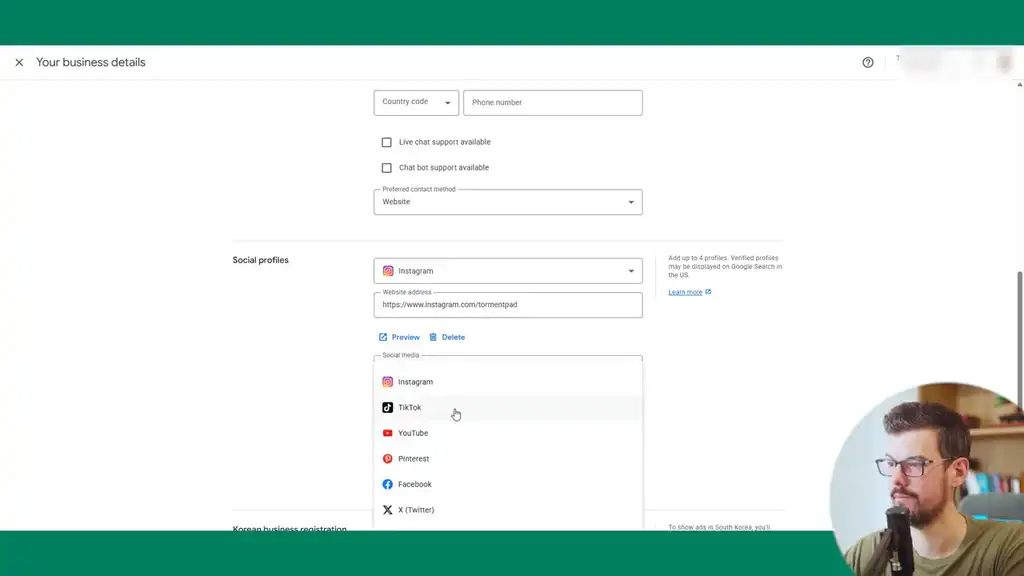
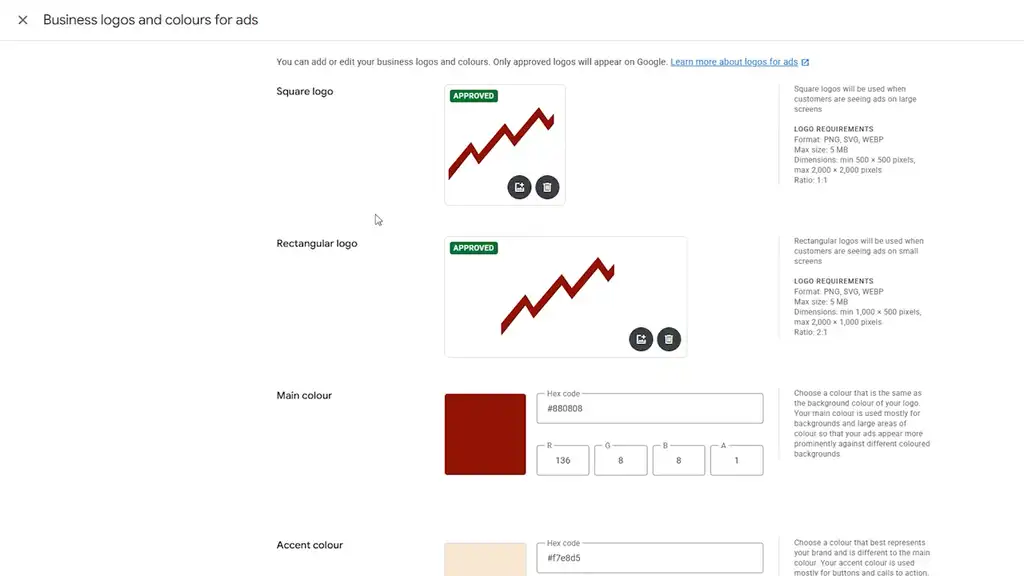
Fill in social profiles, brand logos, and colors. You can upload a square logo here. The biggest mistake is not having it clear enough at a very small size. If you can’t see it clearly at roughly 27×27 pixels, it’ll get disapproved.
For the rectangular logo, you can just replicate it. Set your brand colors with the hex code format. These help support how ads can be shown, like remarketing, they don’t affect what’s shown in the Google search results.
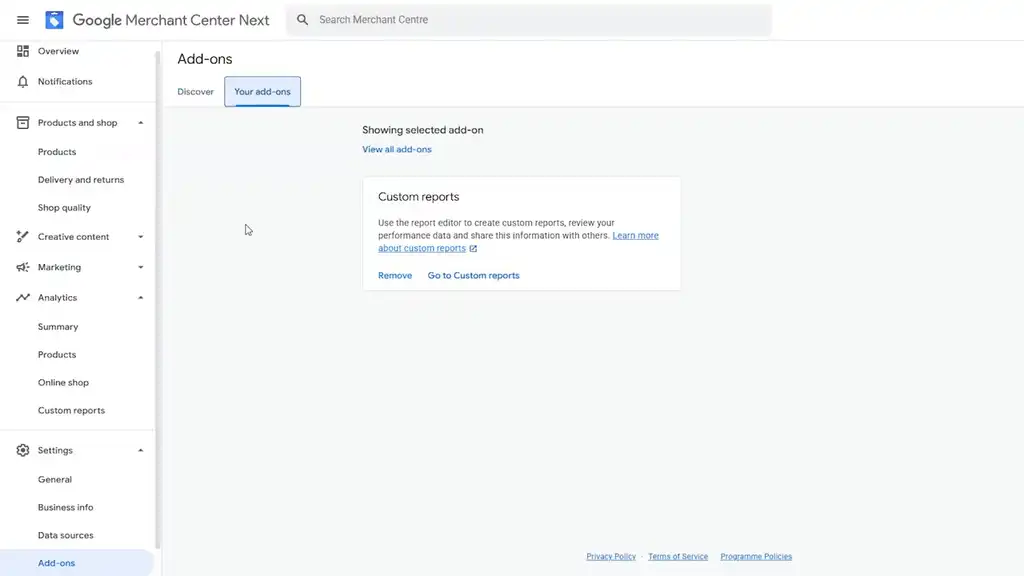
Add-Ons and Programs
With Merchant Programs, also known add-ons, first thing I suggest is adding regions, custom reports, and Advanced Data Source Management as this will give us shopping feed flexibility later on. If you’re getting at least 10 sales a day, it’s worth enabling Google Customer Reviews because that’ll give you seller ratings for the whole store, which Google claims will drive down your average cost per click from the trust built. If you have a local retail storefront, it’s definitely worth setting up local inventory ads. You’ll get free local inventory traffic as well as paid local inventory ads.
If you get over 50 product reviews, definitely submit your application for product ratings. I’ve tested Automated discounts as a program for clients and it was temperamental, but it’s rolling out of beta now.
It’s good for high-SKU stores where you’re competing against others for the same product and customers will cross-compare products looking for the cheapest version. That’s where it particularly shines.
If you’re a high-SKU store selling other people’s brands, you need to pay attention to that. Google has done a good job with not just blasting out discounts, but being intentional with when and what gets discounted. You get full reporting showing statistical significance and reasoning for the performance.
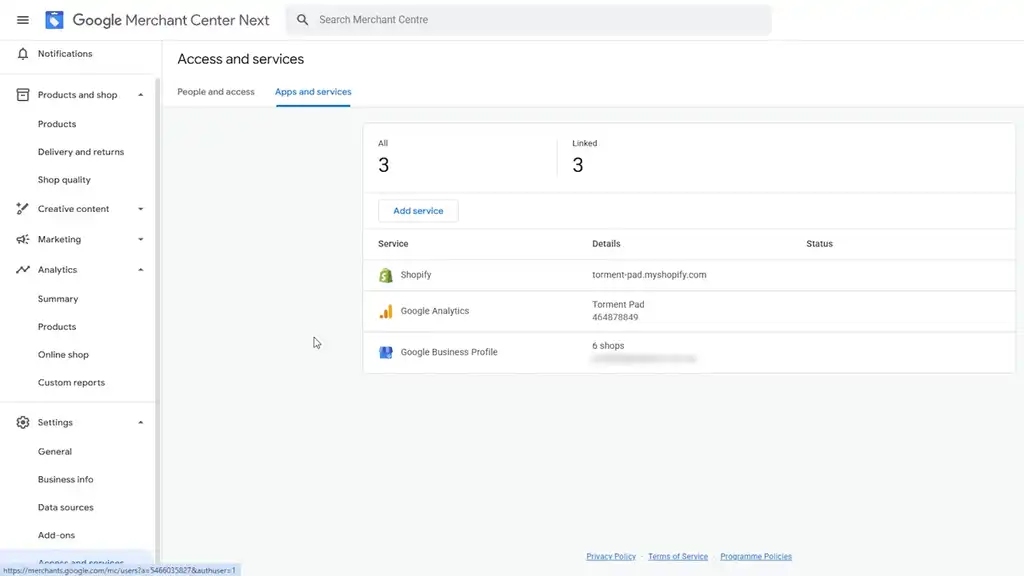
Access and Services
Down in Access and Services, go to Apps and Services. This will come up when you install the Google and YouTube app for Shopify. Get that linked up.
Then add your Google Analytics account to link it up. If you have a Google Business Profile, it’s worth adding if you have a retail front. It’s also worth adding a PayPal account, which can link and build trust for US sellers. If you manufacture your own products, a Google Manufacturer Center is easy to set up and worth linking as well.
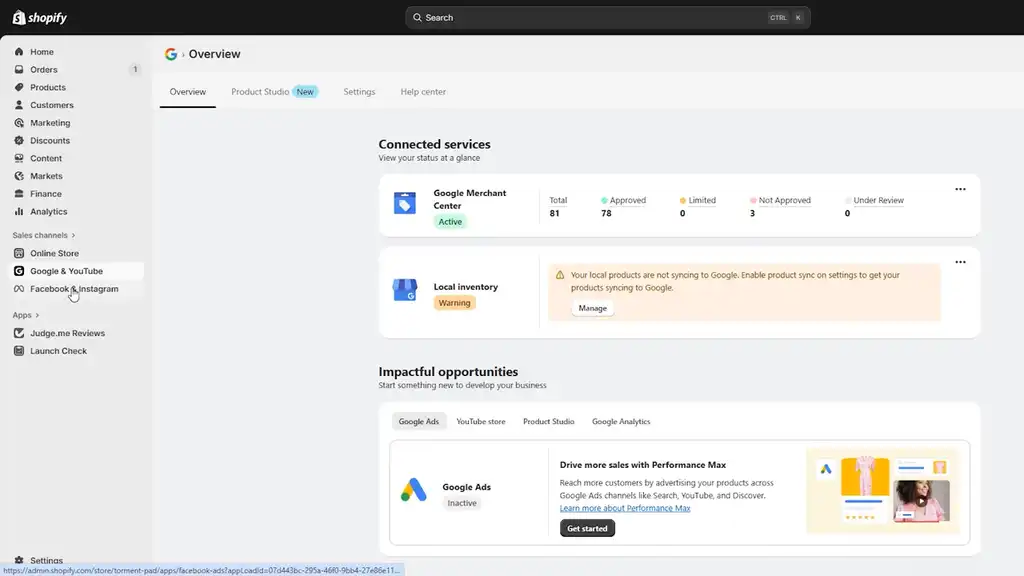
Google and YouTube App: Shipping, Returns, and Feed Settings
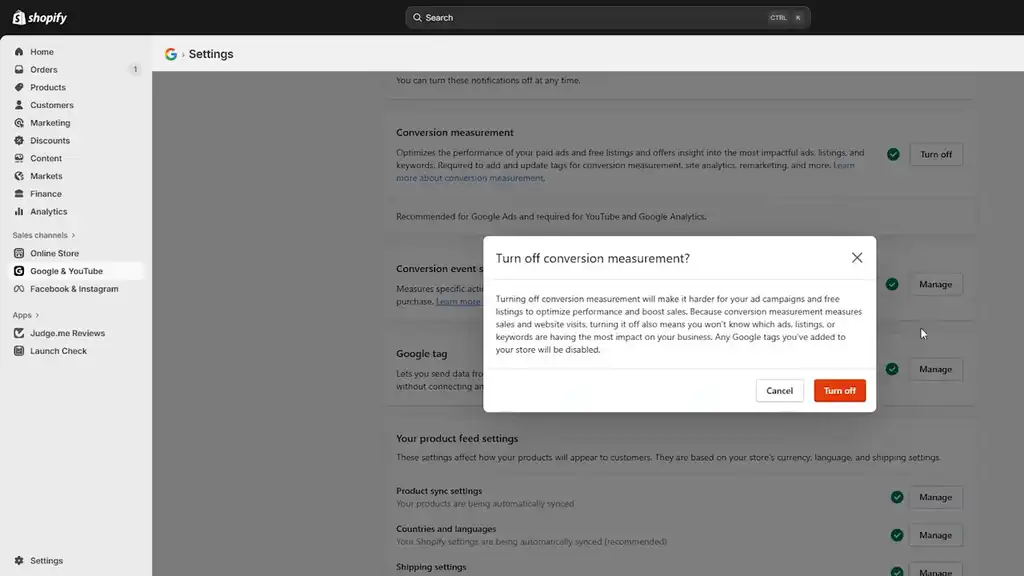
For the recommended feed setup for Shopify brands: install the Google and YouTube app, but you’re not using it for the feed. You’re using it to sync shipping and return settings, not the feed. We want control of the feed. We want to optimize the feed. That’ll drive far better performance than what Shopify forces you to push.
In the settings, link up the merchant account and turn off conversion measurement because we want to install a better version of the code, which I’ll give you, and it’s just as easy to copy and paste.
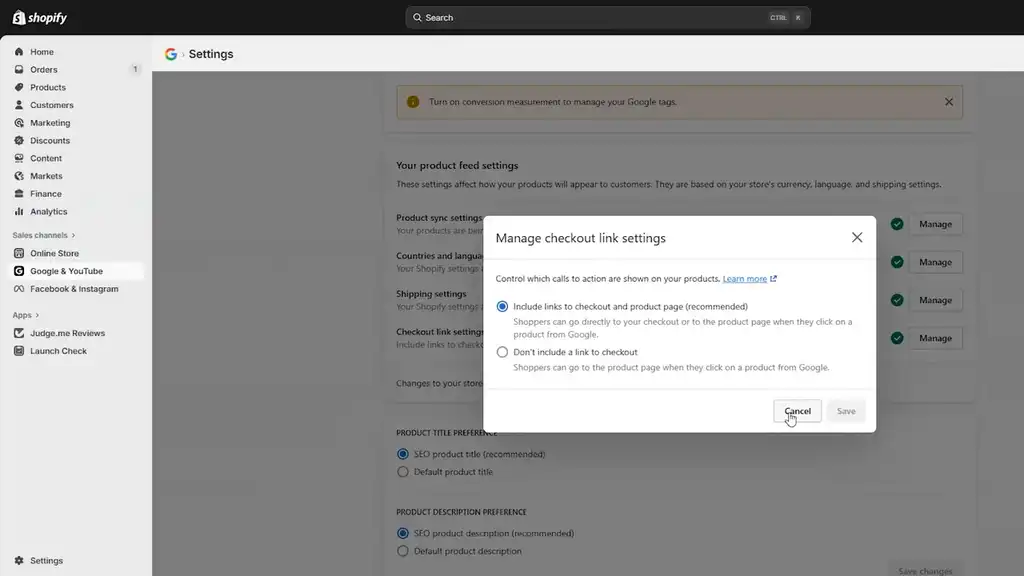
In the product feed settings, enable automatic sync for all the countries the product ships to. Shipping settings should be imported as that will influence the delivery policies. The title preferences you can ignore because we’re going to optimize our own feed, but it’s worth setting it to the SEO-optimized feed which gives you control over a more keyword-rich field as opposed to the product name.
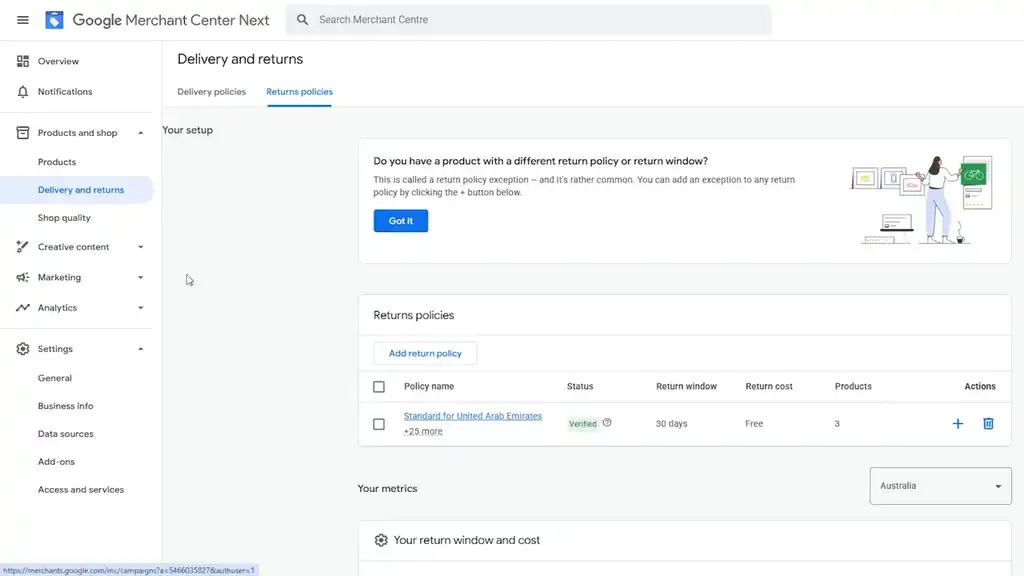
Check your return policies as well. This will be what gets synced from Shopify.
Google Shopping Feed Optimization with DataFeedWatch
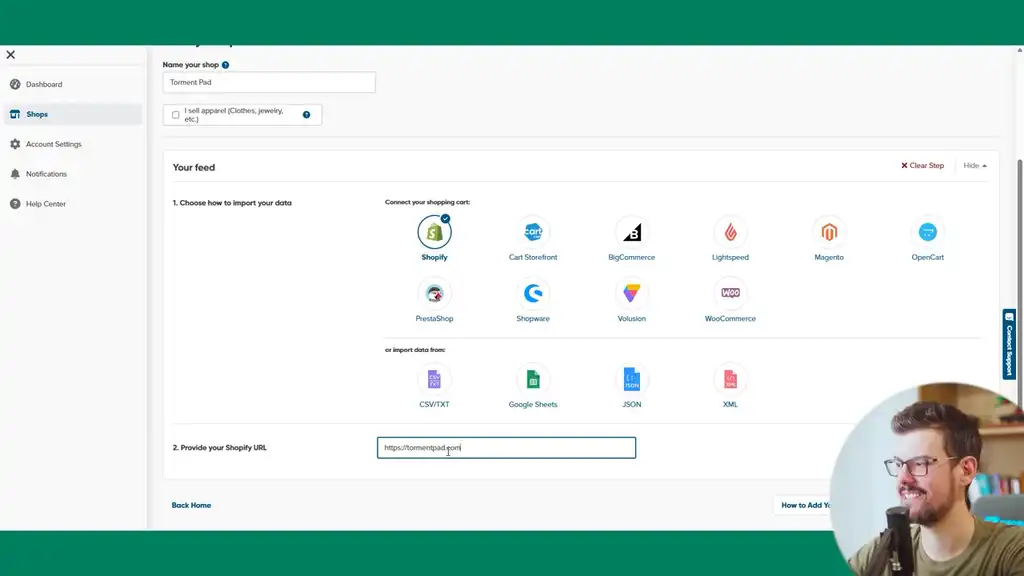
The next most important thing is feed optimization and I’m going to show you every step. We want control of the feed for many reasons you’ll see as we go. I’m going to install the DataFeedWatch app. Go to digitaldarts.com.au/dfw, sign up for DataFeedWatch, and install the app.
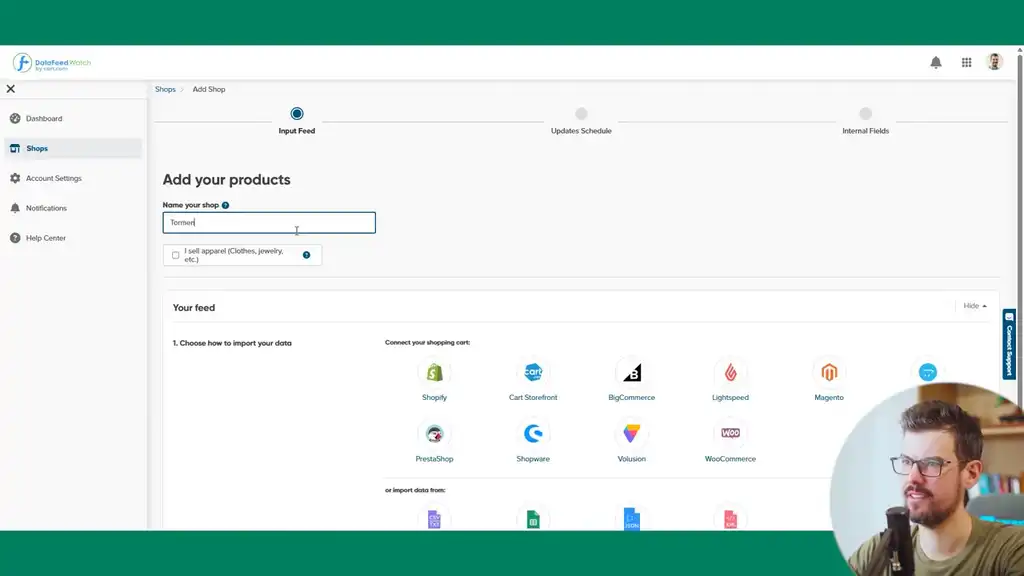
When you’re in DataFeedWatch, enter the shop name. DataFeedWatch provides a bunch of pre-built feeds that can speed along the whole build process. Enter the full domain as to how you want it to appear in feed links and because it’ll configure redirects by modifying URLs that come through. For example, the myshopify.com links will get excluded and the feed will be directly linked to the proper URL, which can help with disapprovals because Google Merchant Center requires that products go to the URL that’s verified.
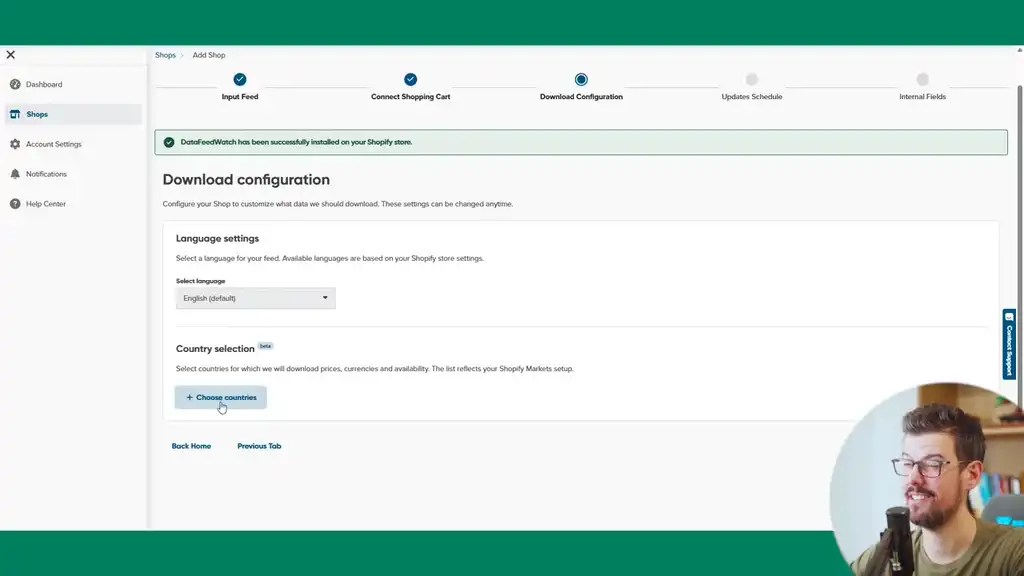
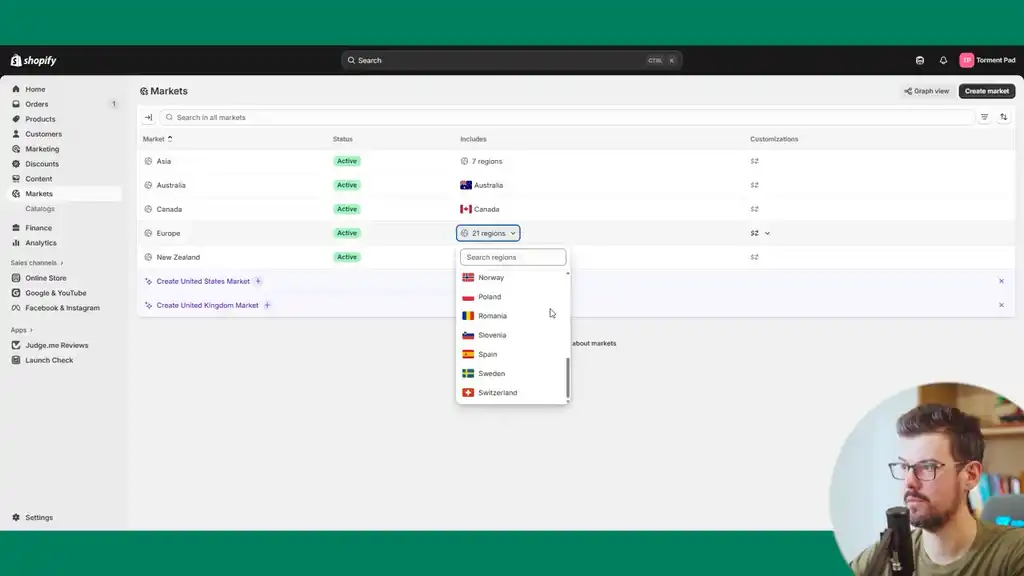
Configuring Countries and Markets
Install the DataFeedWatch app on the store. Then check the countries the feed delivers to. Go to the markets for the store and sync those up within DataFeedWatch. Having this set up will mean that prices and currency become accurate and easier to manage.

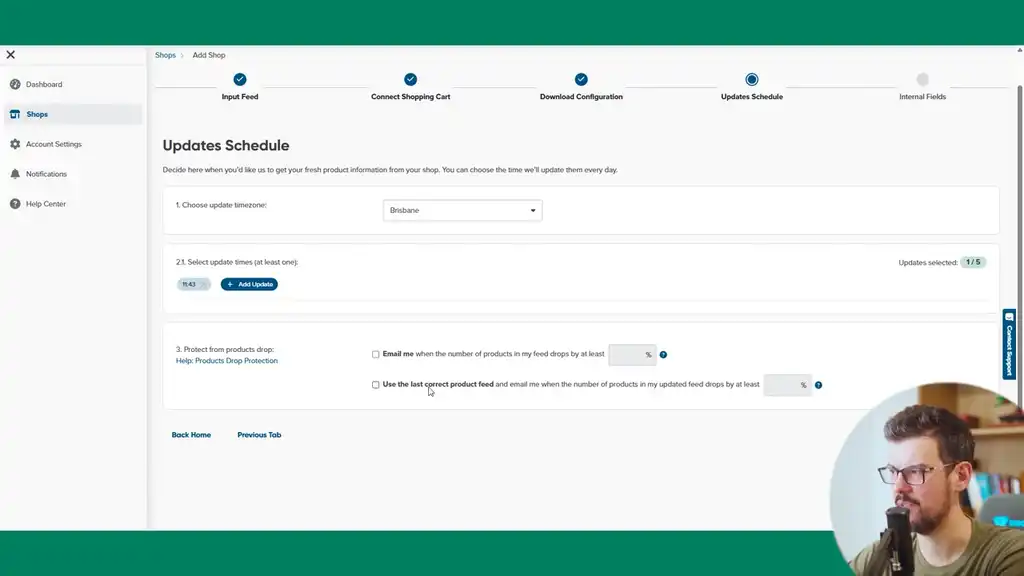
If you do frequent product updates, it’s an easy win to get more clicks and impressions by having a feed fetch time that’s more frequent than just once a day. If you get disapprovals, this is a quick fix you can configure.
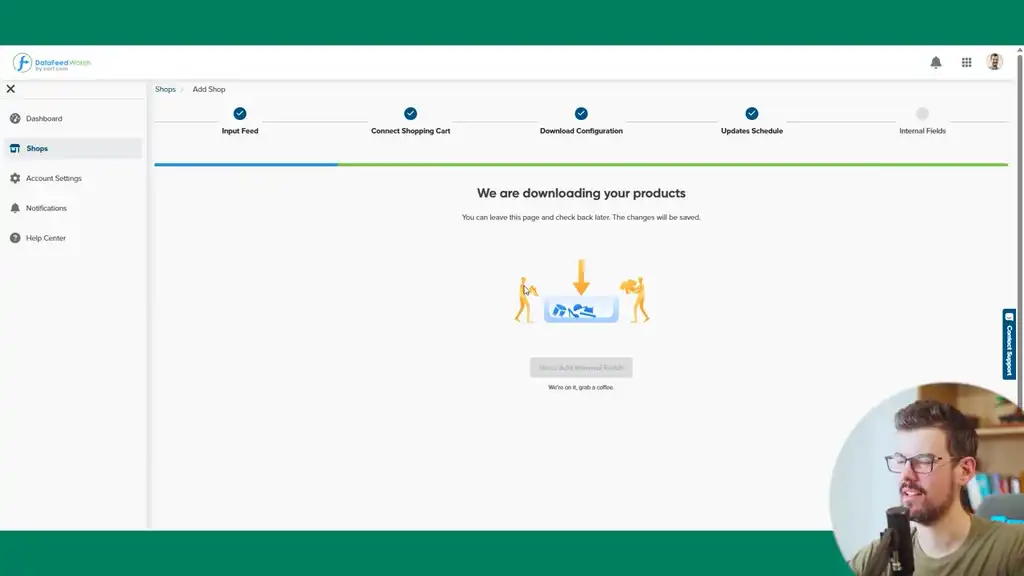
Now DataFeedWatch is downloading and syncing the products from Shopify. Once that’s done, we can begin working on everything for the feed.
Understanding How DataFeedWatch Functions at Each Level
The most important thing in DataFeedWatch is to understand how it functions at each level.
- You’ve got the shop level where your whole store data that gets pushed from metafields.
- Then you can shape that with what’s called internal fields or master fields, which helps you manage fields all at once.
- Then you push those fields to channels: your Facebook feed, your Google feed, your Google AU feed, NZ feed, and so on.
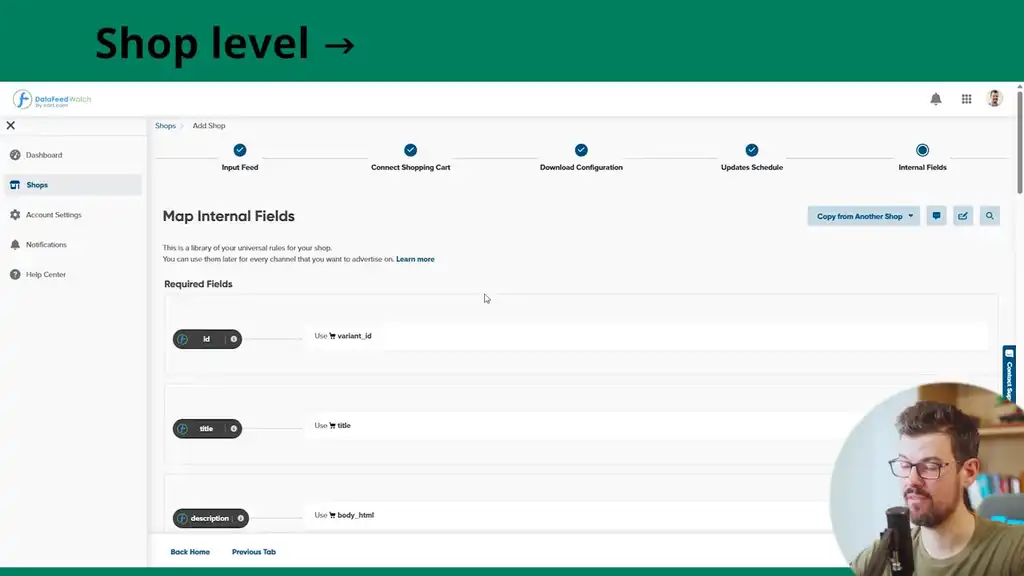
You set your settings at the shop level as best you can, and then you can quickly branch them out on a per-channel basis. That branching understanding is critical for being able to deal with Merchant Center problems.
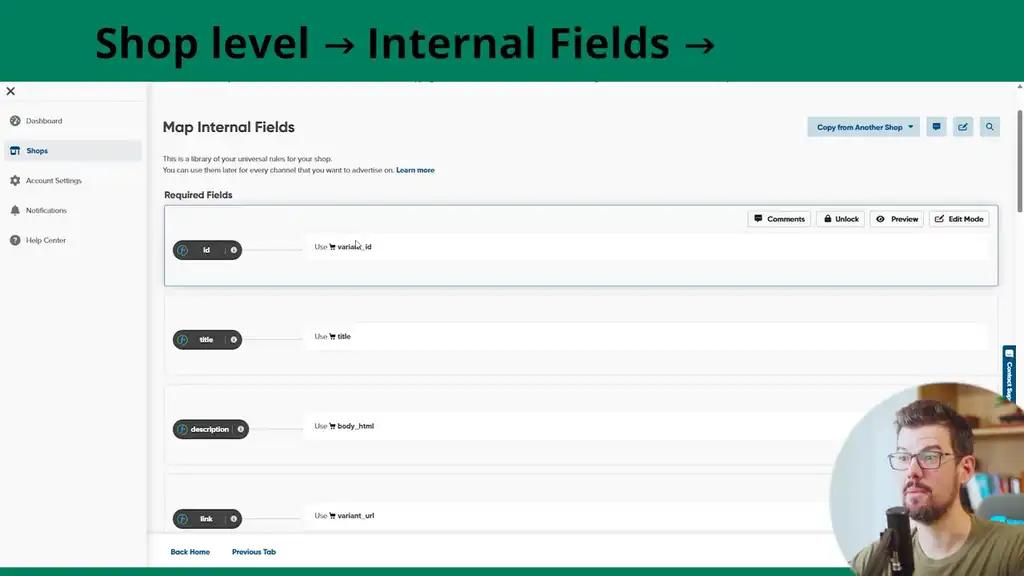
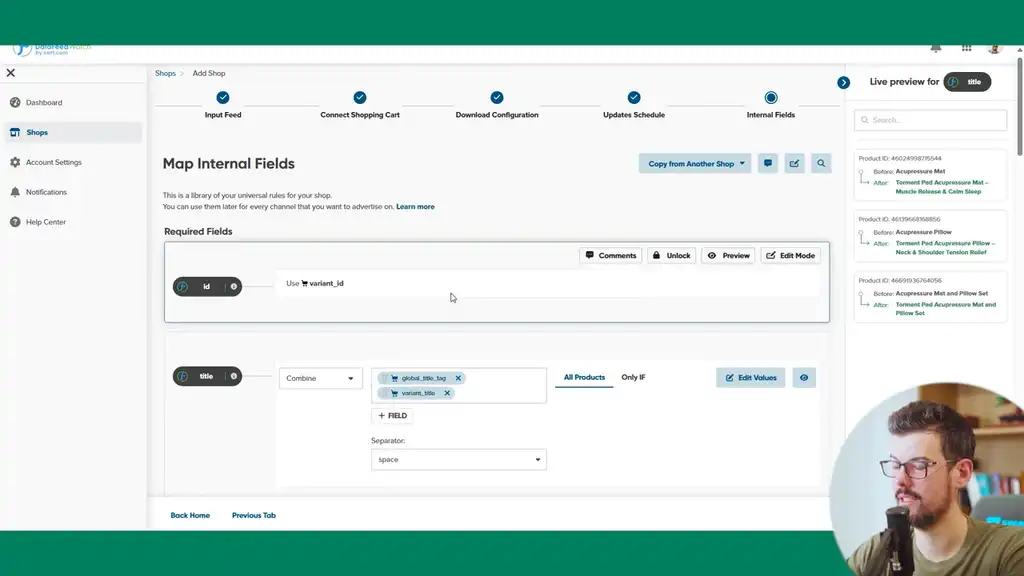
Configuring Internal Fields: Titles, Condition, and Barcodes
The first quick thing to configure is the title field. Set this to the global field; this is Shopify’s SEO title tag field. If you have variants, you can combine the variant value with a separator and the variant title, which will output a combined title. Keep it simple to begin with and optimize as you review.
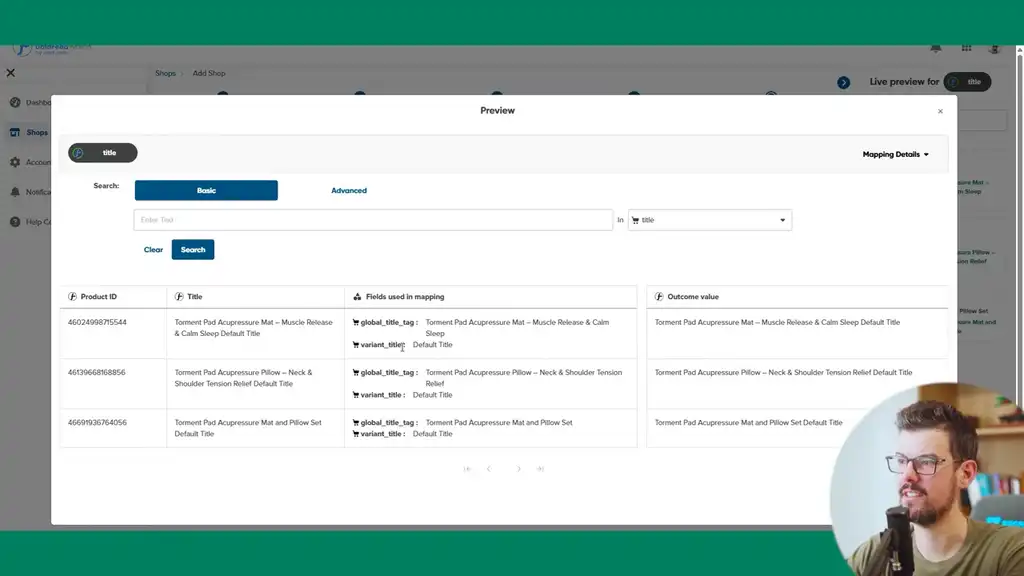
The goal with any feed management is to provide the most complete data possible in the most accurate way. Even if something’s not required, you provide it because you’re giving Google the information it needs to perform.
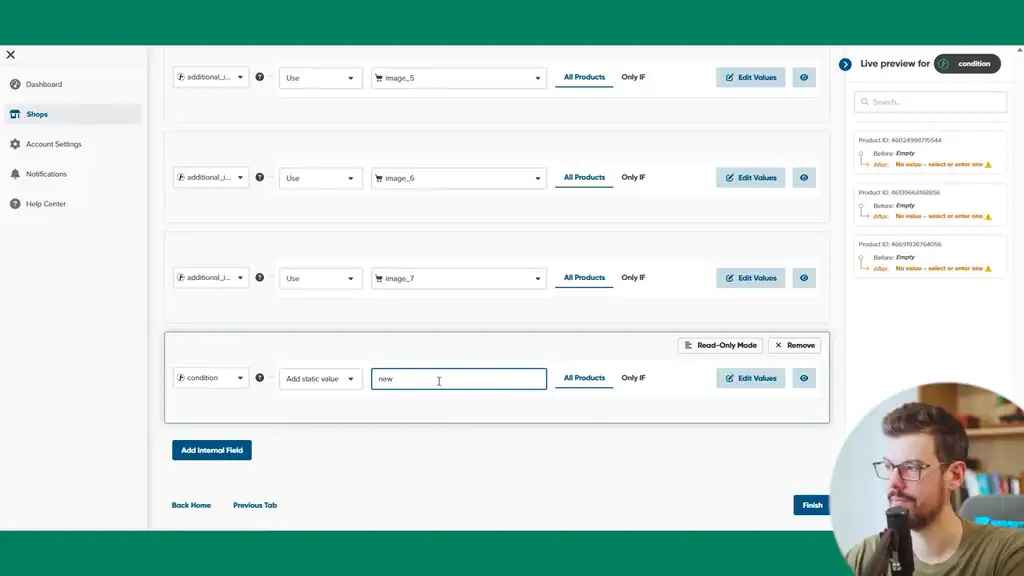
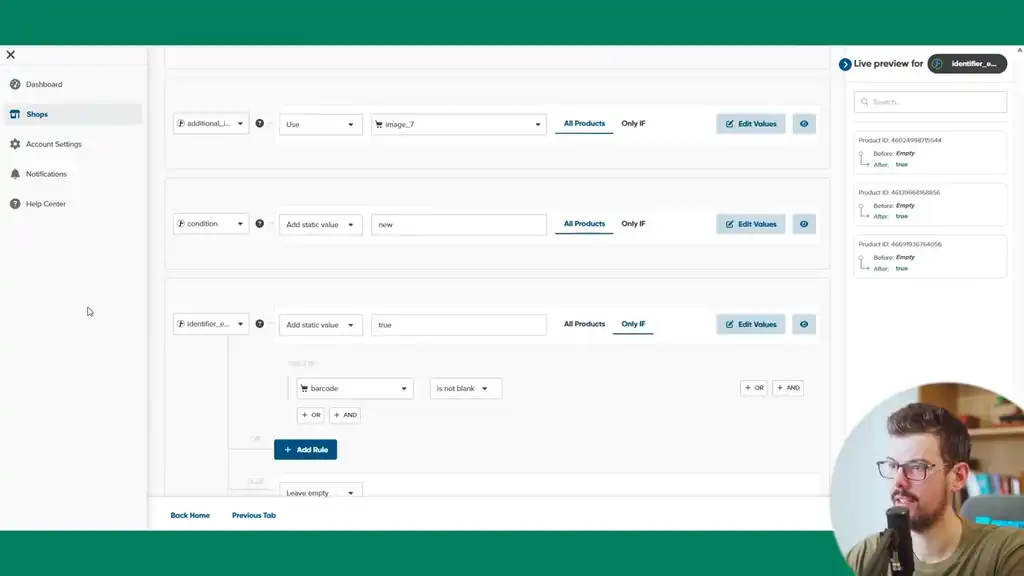
One field to set up is the condition field. Use a static value of “new.” If the store has barcodes, set up an identifier exists field set to “yes.” If the barcode exists and is not blank, set that to true. That will then support the GTIN.
Setting Up a New Feed and Naming Conventions
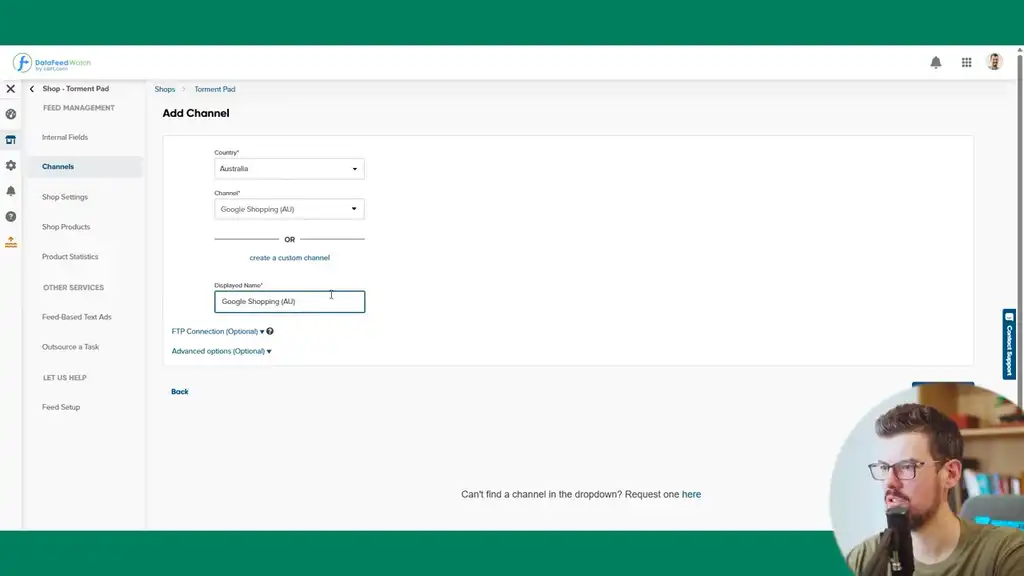
Now it’s time to set up a new feed. We’ll go with Australia to begin with in Google Shopping. Use a clear naming convention: Google Shopping AU. For the feed URL structure, I suggest sticking to the default format which will output Shopify, all lowercase, the country field, the product ID, and then the variant ID. Stick to this for simplicity if you’re starting out.
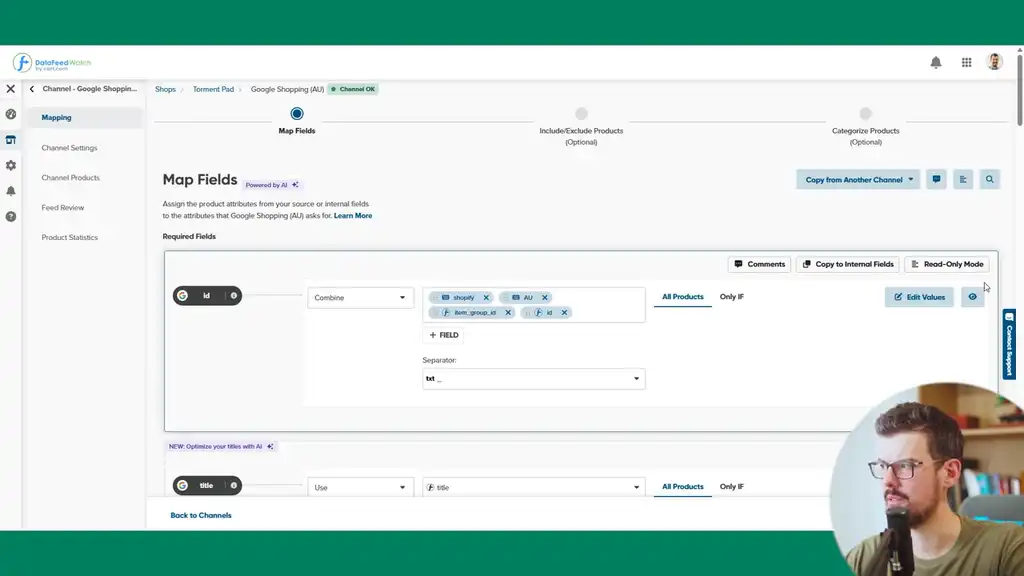
Once your campaigns start running, you don’t want to be changing these IDs because machine learning data is baked into each ID; you’ll be resetting and losing all the learnings every time you’re required to change IDs. The only time it’s valid to change IDs is perhaps for product disapprovals.

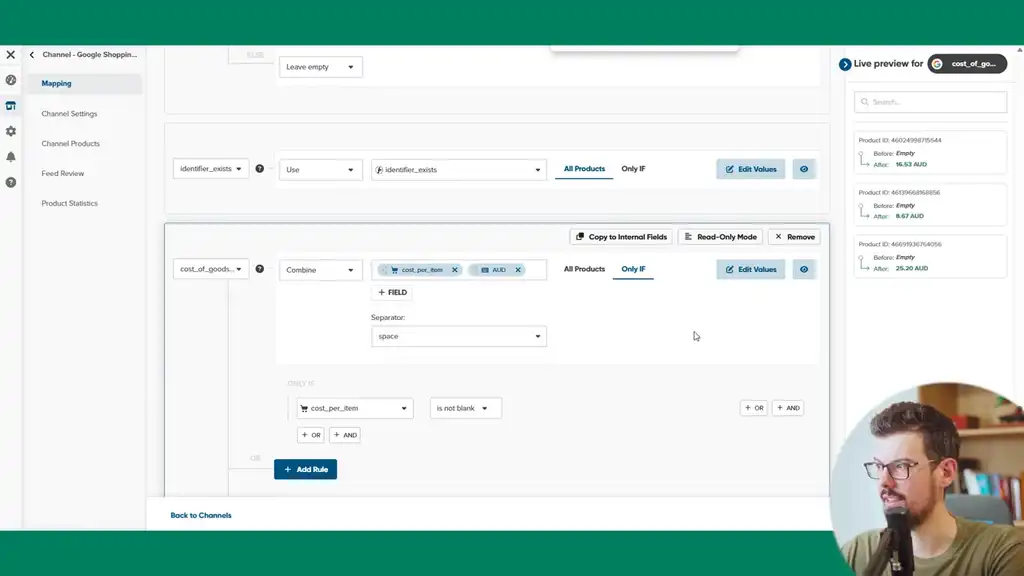
Cost of Goods Sold Field
The other field we’ll set up is cost of goods sold. This will work with the conversion tracking you’ll set up. Map this to the cost per item field. The requirement is that there’s the right currency. Set a separator by space, then enter a static field which is the three-character currency code, and this will output in the correct format.
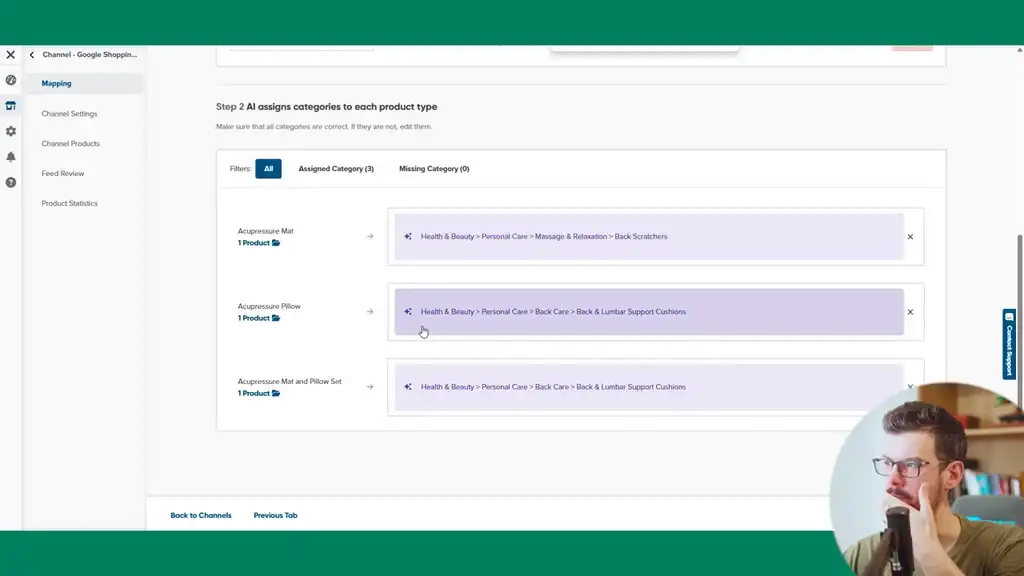
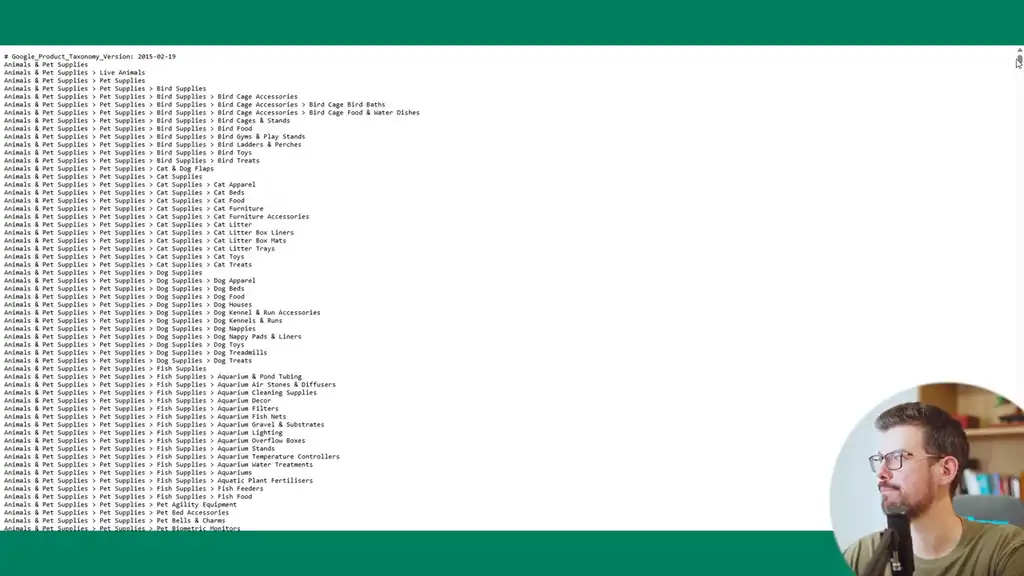
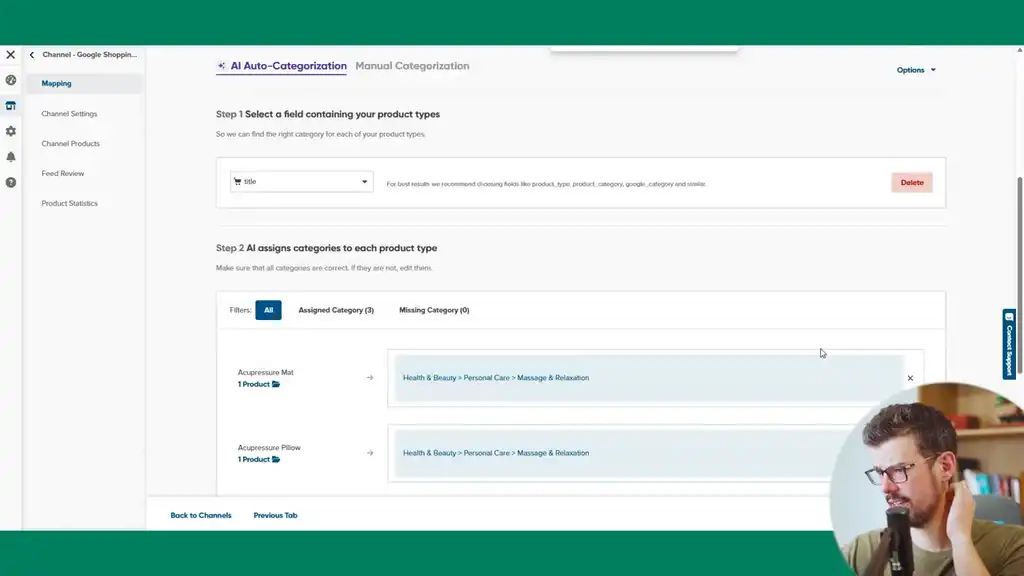
Product Categorization
Categorization matters for shopping categories and helps Google identify a relevant product. DataFeedWatch will automatically match based on title. The best approach is to choose the most accurate category. If you can’t find anything niche, go to the most relevant parent category. You can get wins and improve shopping campaign performance just by categorizing products properly. Being more niche where possible helps, and being accurate where it’s currently wrong helps too.
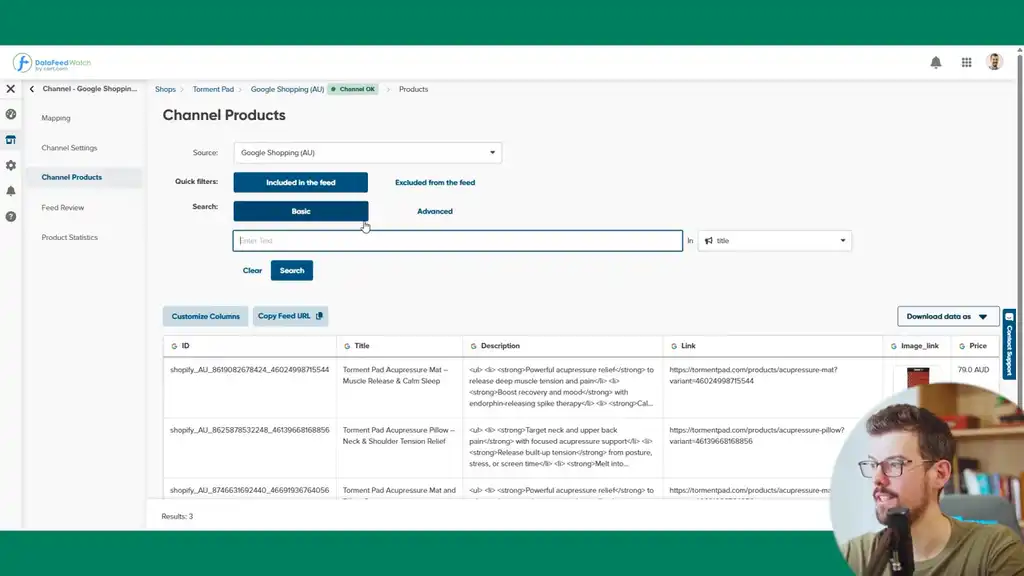
Reviewing the Feed and Submitting to Merchant Center
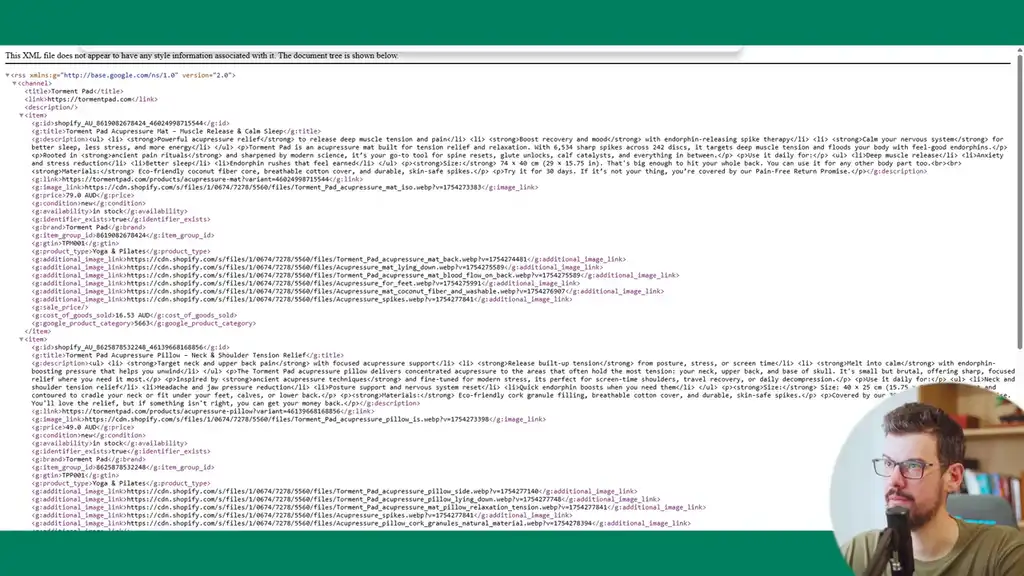
Once the feed is completed, review it by clicking the channel name and going to Channel Products. Walk through the URLs, the title (which can be improved), the description (HTML can be removed and improved). Make quick notes of early feed optimizations in your project management tool.
The most important thing is to just get going and get the feeds submitted. If you’re new to feed management, don’t dig yourself deep into the data. Copy the feed URL and jump into Google Merchant Center to submit it.
Go to Managed Product Data Sources and add a new source. We’re going to do a supplemental feed to support the data and override the Shopify app feed. For feed labels, I suggest using the two-character country code as this will help you configure the right feed on the Google Ads side.
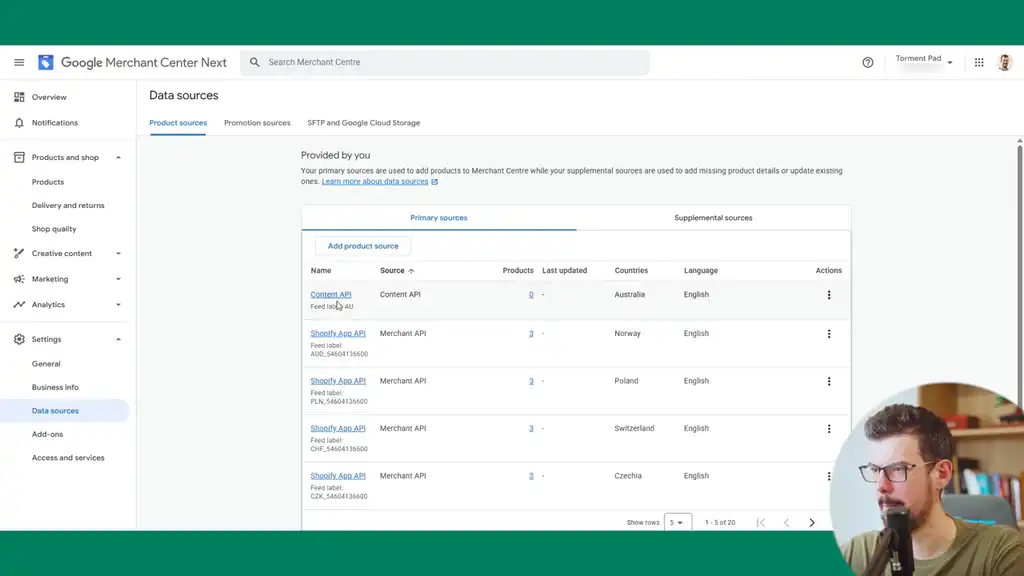
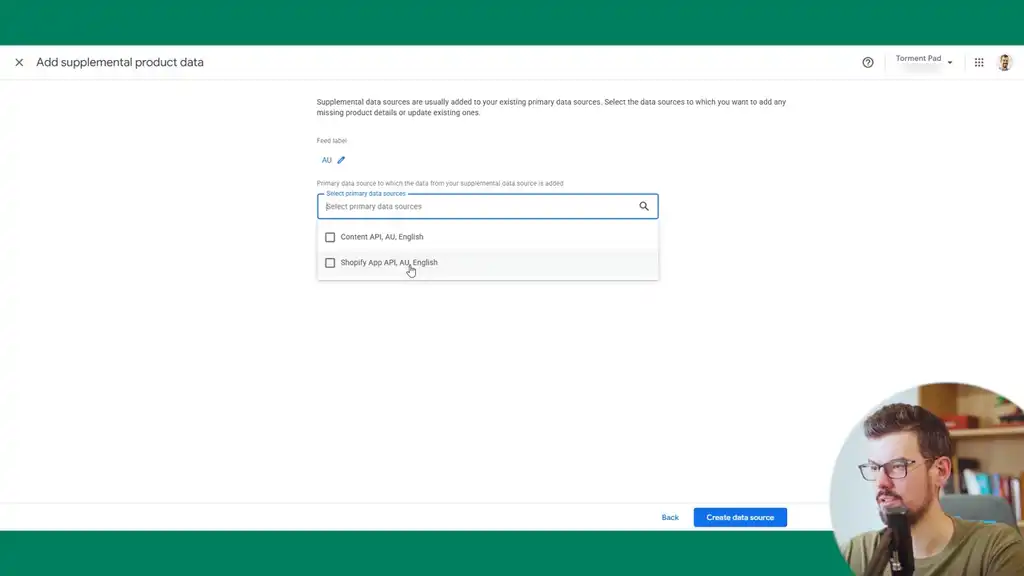
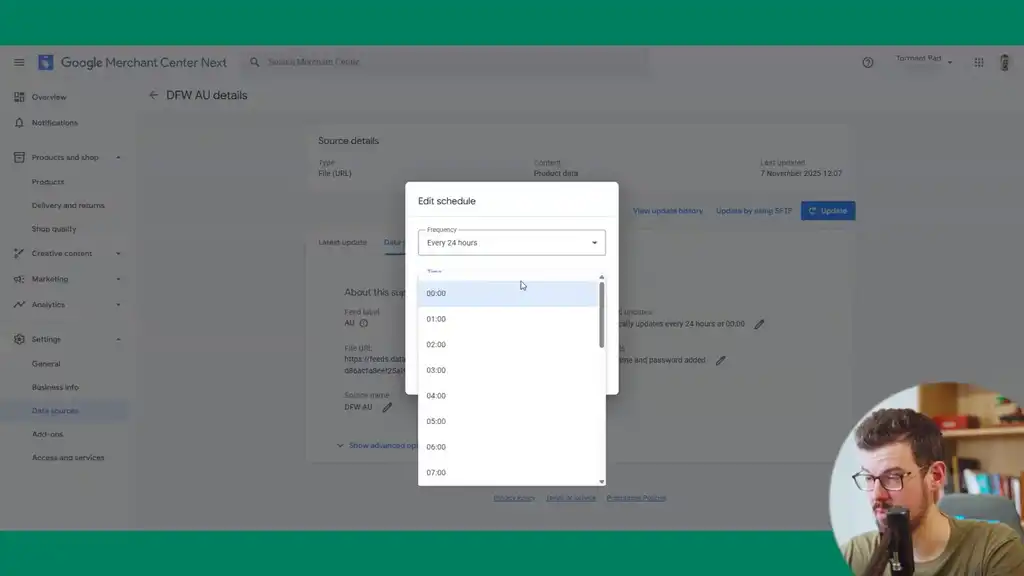
Configure the source name to be “DataFeedWatch AU.” For scheduled updates, base them on your DataFeedWatch sync settings and make sure the time zone setting is configured correctly for both accounts. Allow at least 10 minutes after the schedule time to update, and then that update will be pushed to Google Merchant Center.
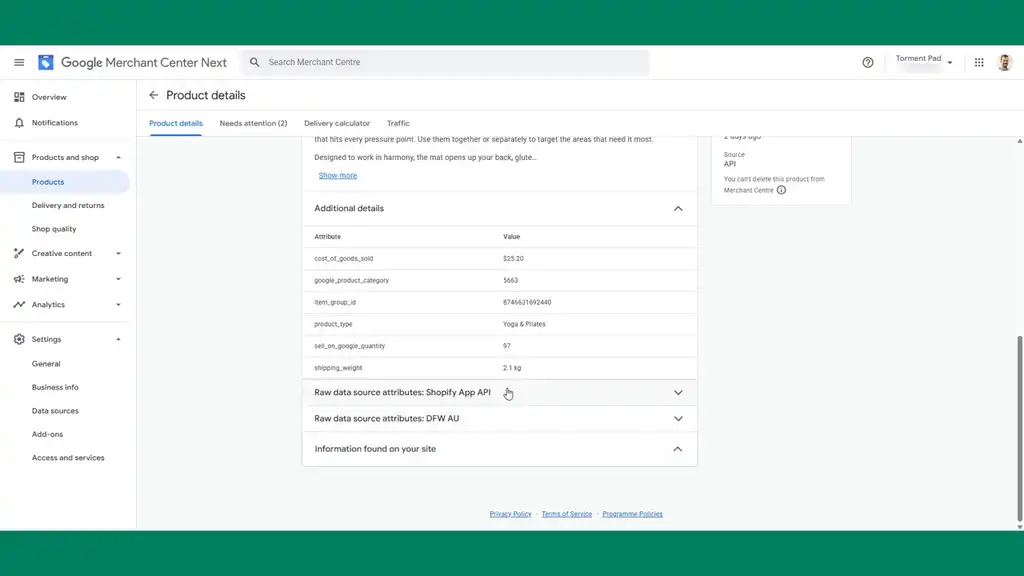
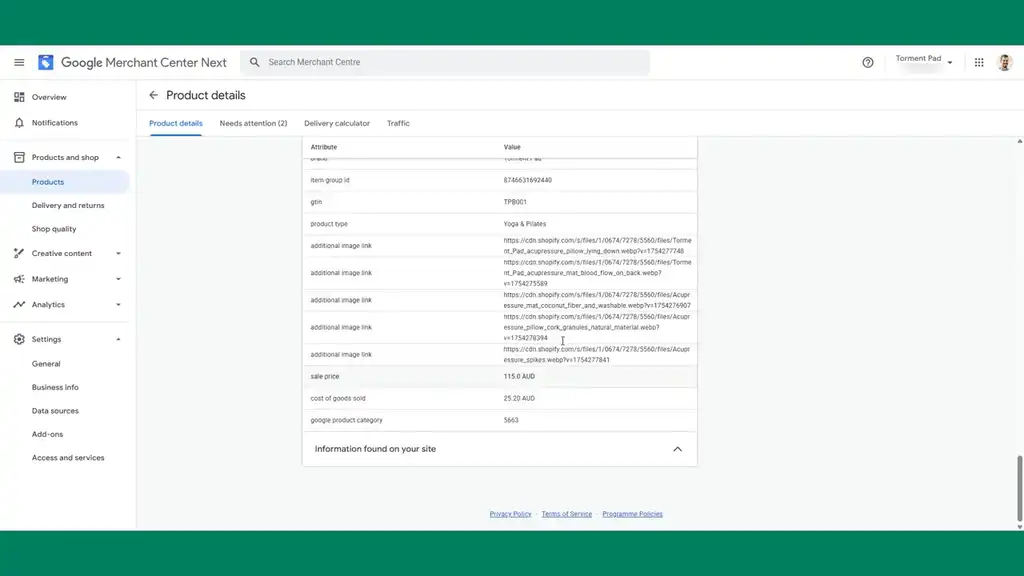
After being set as a supplemental feed, the information found on your site comes from schema and your Merchant Center settings as the base data. The supplemental feed then overlays that. We want Merchant Center to use our supplemental feed as a source and be able to overwrite anything. This gives us flexibility to set rules within Merchant Center to change data as needed.
Advanced Feed Optimizations
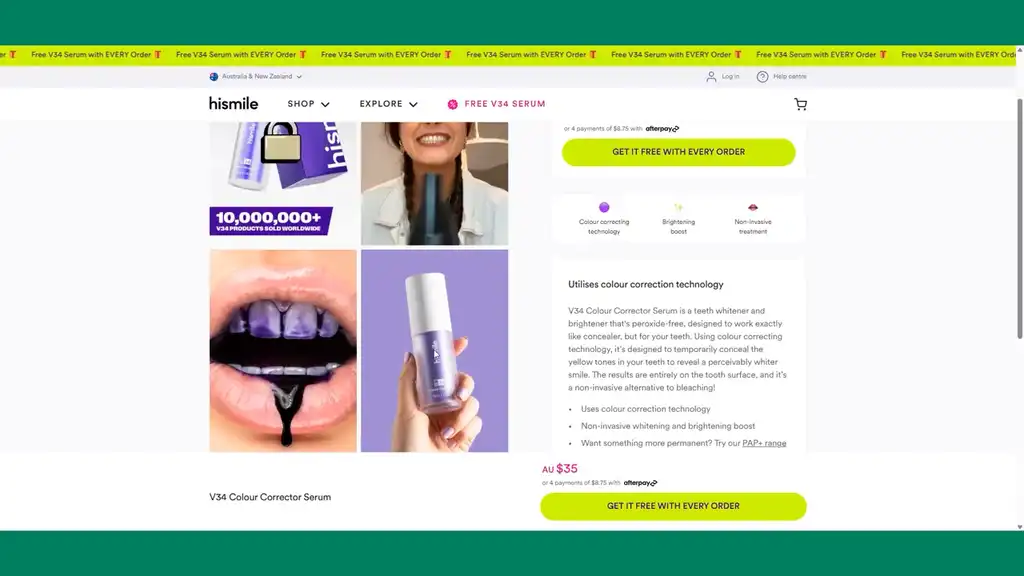
Within DataFeedWatch you can create your own custom description and optimize that based on the data. Same with the image link, you can set any image link you want as opposed to the default product field. The best Shopify brand I know of that does this is HiSmile. Rather than using the default product image, they use a lifestyle image of someone holding the product which makes for a very different, more compelling visual.
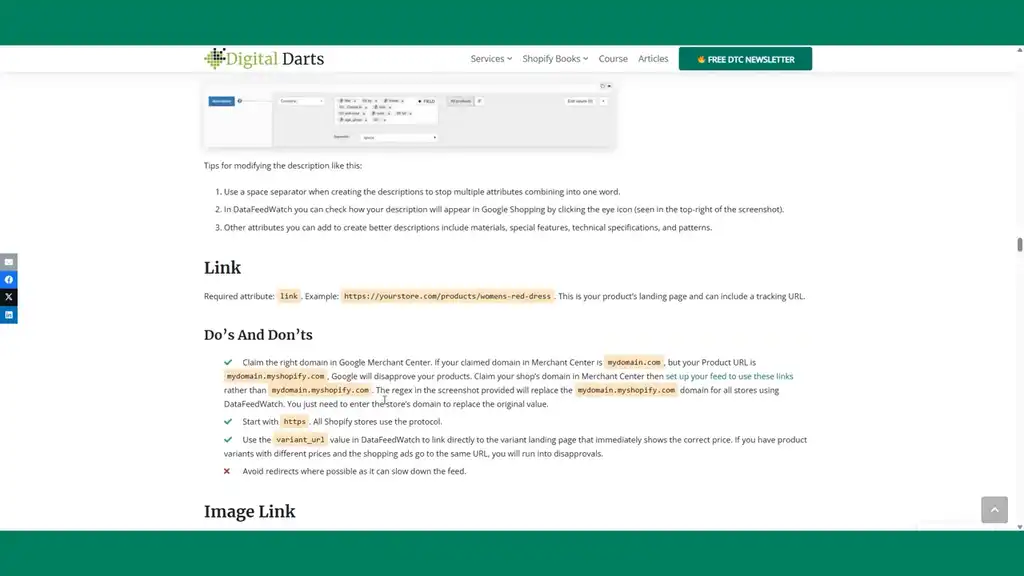
You can check out my book Google Shopping for Shopify which covers so much more in depth than whatever I could cover here in this tutorial. There’s so much you can do within each feed field.
For the sake of getting going, I’ll keep it simple, but the book has a full chapter on Shopify feed optimization. In it is everything you need, like guidelines of what to do with descriptions, what not to do, and examples of how to optimize within DataFeedWatch.
Linking GA4, Search Console, and Other Services in Google Ads
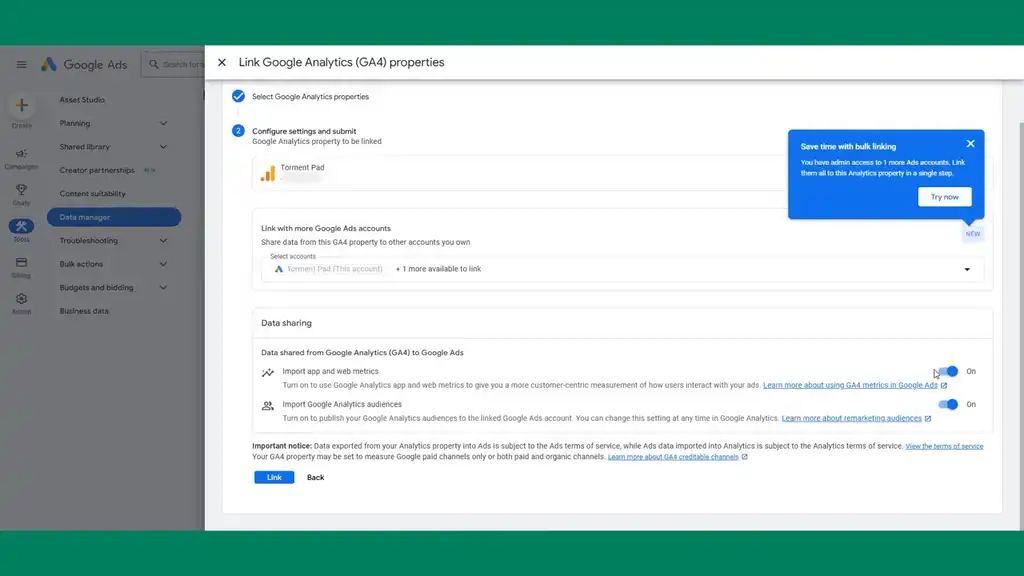
Within Google Ads, we need to link up the various services. Go to Tools > Data Manager and link up the Google Analytics property. Import audiences and import app and web metrics. This will unlock new columns you can use in ads management.
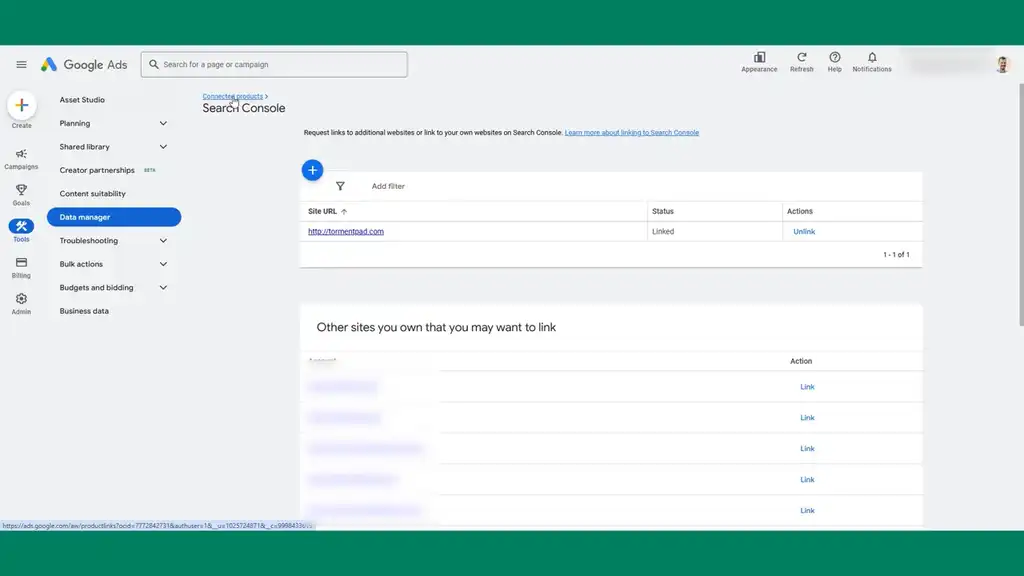
Link Google Merchant Center as well. The last thing you should link is Search Console which will help give search queries and keyword ideas. If you have a retail storefront, link up your Google Business Profile. And if you intend to run any YouTube-related ads, link your YouTube channel.
Google Ads Tutorial: Building Your Shopping Campaign
With all of that done in Merchant Center, we’ll create a shopping campaign. The choice comes down to Performance Max vs. shopping. If you’re a new account, start with shopping until you’ve got thousands in revenue of proven data coming in every week. This will help you make so many more optimization decisions that are valuable and stop you from leaking sales.
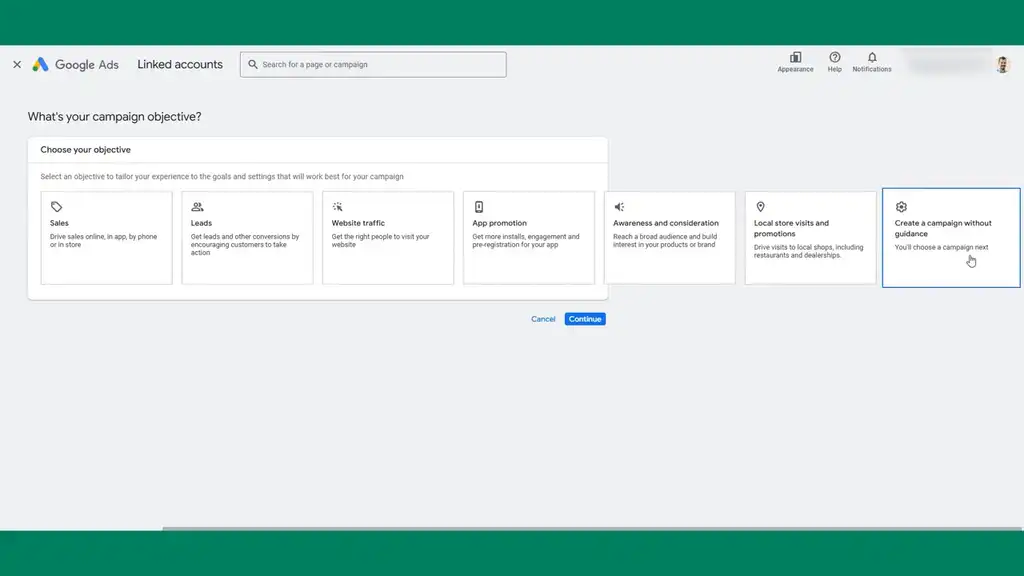
For the campaign objective, create a campaign without guidance as this doesn’t affect any campaign performance. It will just enable you to get the settings you need. For Shopify brands, we’re creating a shopping campaign. If you can build a shopping campaign, you can build a Performance Max campaign easily. The only exception really is the audience signals, which you can build through the customer match list I’ve talked about.
Select the Merchant Center account. We’re doing a standard shopping campaign. Google’s still trying to push Performance Max but don’t select it. There’s a reason I selected shopping: it performs better for new accounts.
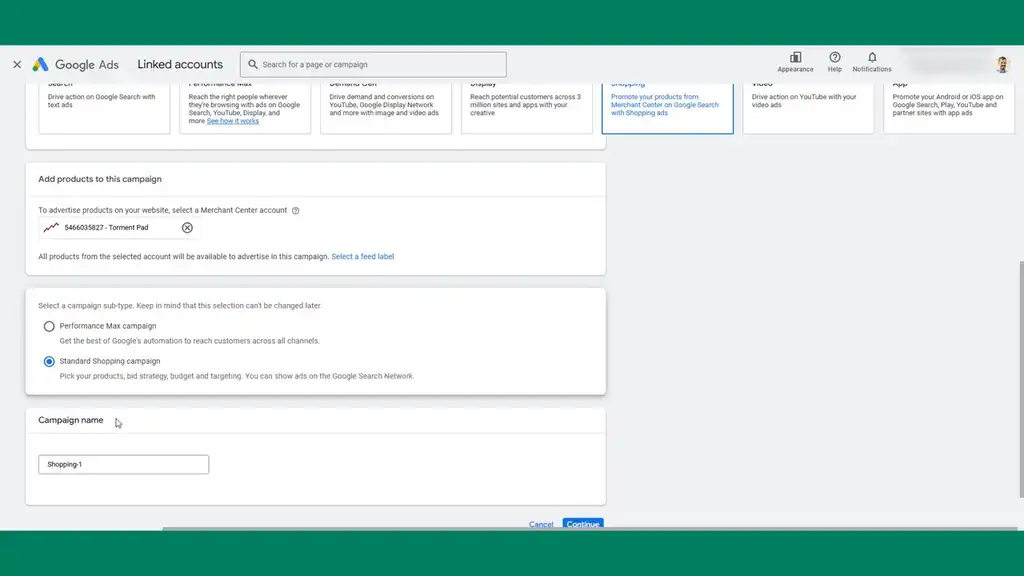
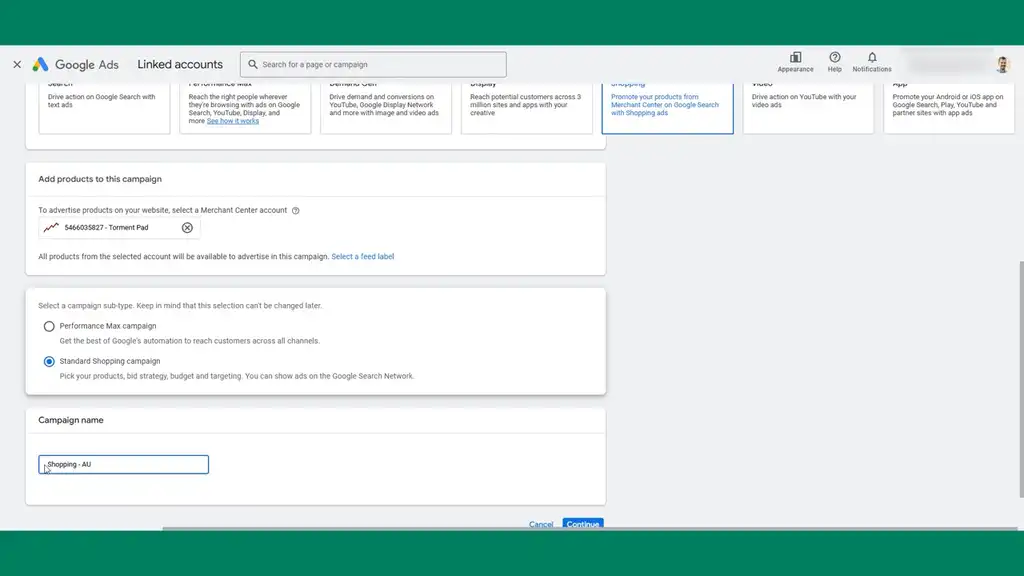
Naming Conventions and Bid Strategy
You have to consider naming conventions right from the start. The campaign type is shopping, and we’ve got the region that the first campaign will target. If you’ve got multiple brands, you can preface with a short code. As you expand, you can split out your shopping campaigns by branded and unbranded. For this structure, a simple one that works for most brands is: campaign type, country, and sometimes bid strategy for clarity.
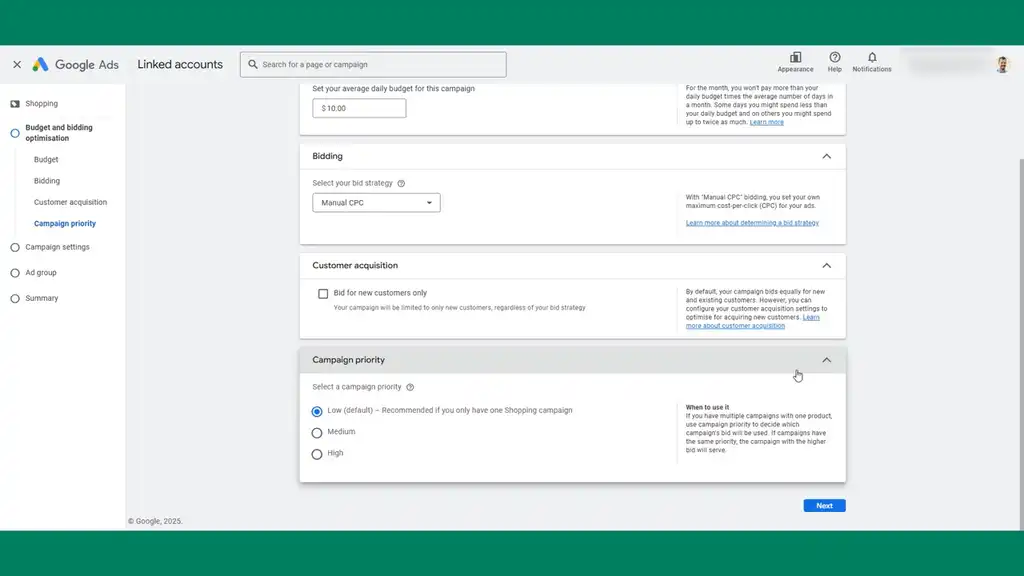
Set the budget to $10 to start. Most new campaigns will benefit from a manual CPC bid strategy, contrary to what some say, which is automatically enhanced. This gives us control. If you’re getting over 50 conversions a month, that’s when you definitely transition to a target ROAS bid. But we want granular control over the bidding to get the brand going.
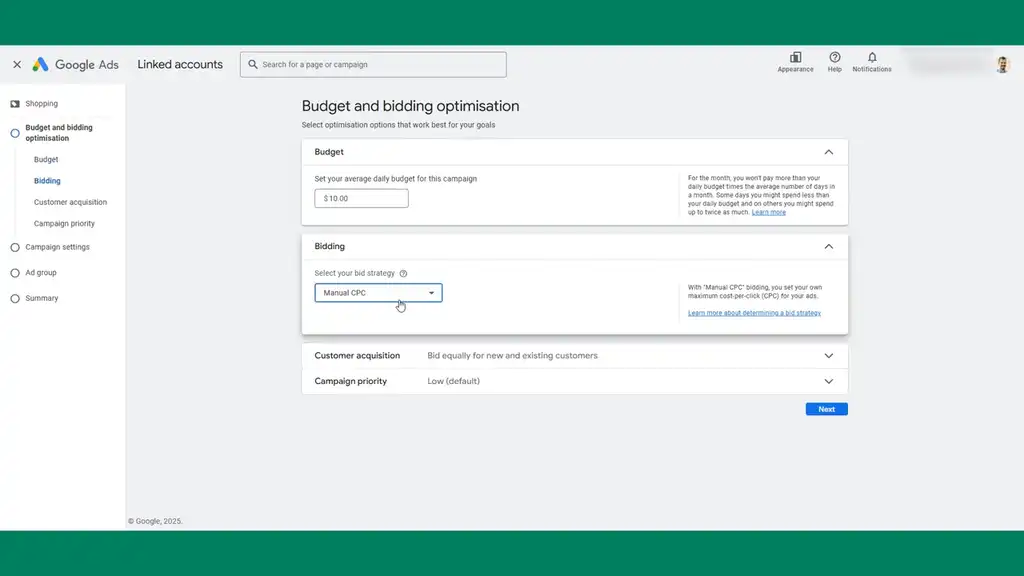
In customer acquisition settings, this is pointless to configure because your incrementality (the new customers you acquire) doesn’t come from algorithmic settings. It comes from what you’re actually bidding on and your campaign structure. The greatest determinant of incrementality is what people are searching. New brands don’t need to be concerned about incrementality. They just need to be driving profit.
For campaign priority, set this to low because we’re going to have one shopping campaign. This only becomes important if you’re running multiple shopping campaigns where you’re funneling searches through negative keywords into a particular campaign priority.
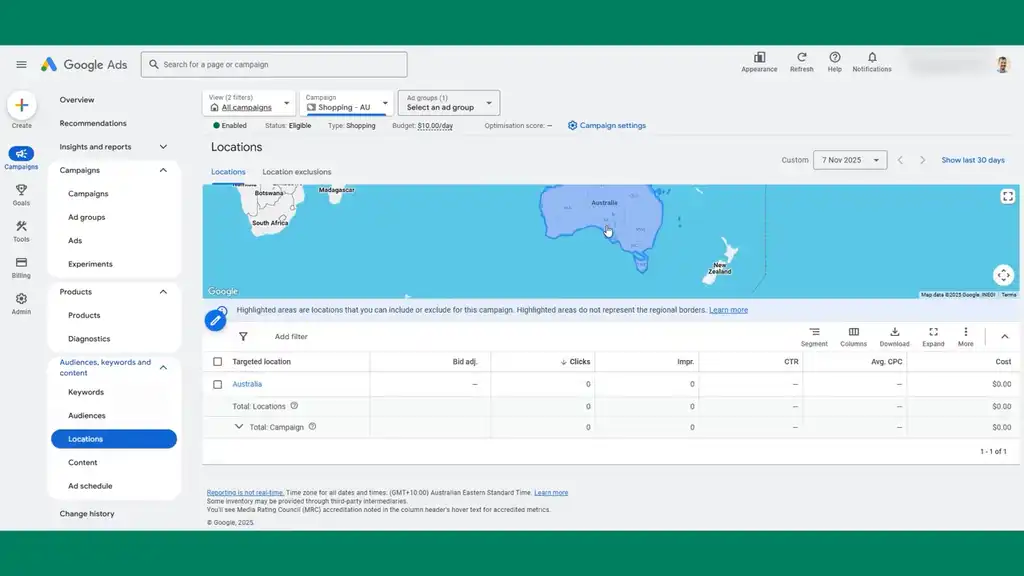
Location Settings
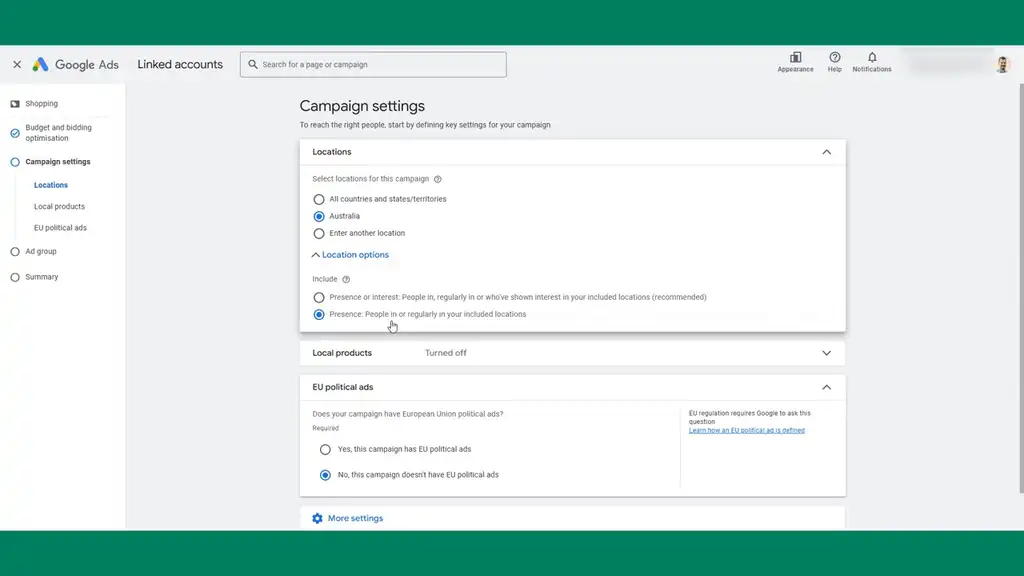
For location, set it as default to “presence”. Don’t use “presence or interest”.
This lets you distinguish between the two with a Google Ads report that tells you if people in another country are interested in your region. We want to narrow the options for success and give everything we can to succeed.
We don’t want people in the United States who happen to visit Australia searching for the product. Google can determine that it thinks those people are interested based on the search query or normal browsing.
It can work for some stores, but as an optimization later on as you get going, it’s worth testing. For now, we want success, so turn that off.
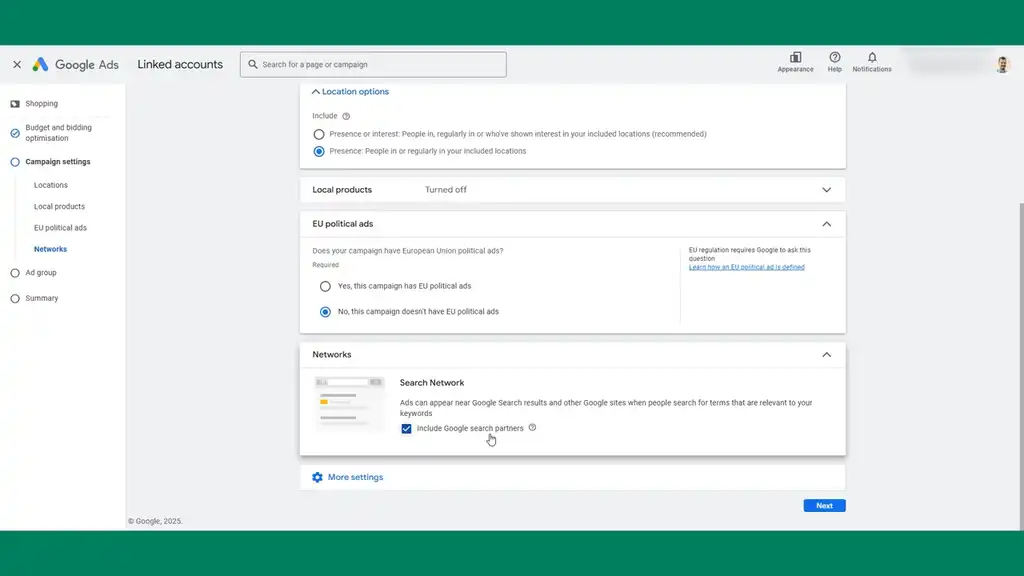
If you’re being conservative and want to give your campaigns the best chance, exclude Search partner networks. You’re already helping Google with what’s most likely to perform, which is its own search. This will drive potentially an extra 5–10% revenue, so it’s worth selecting when you’re looking to optimize.
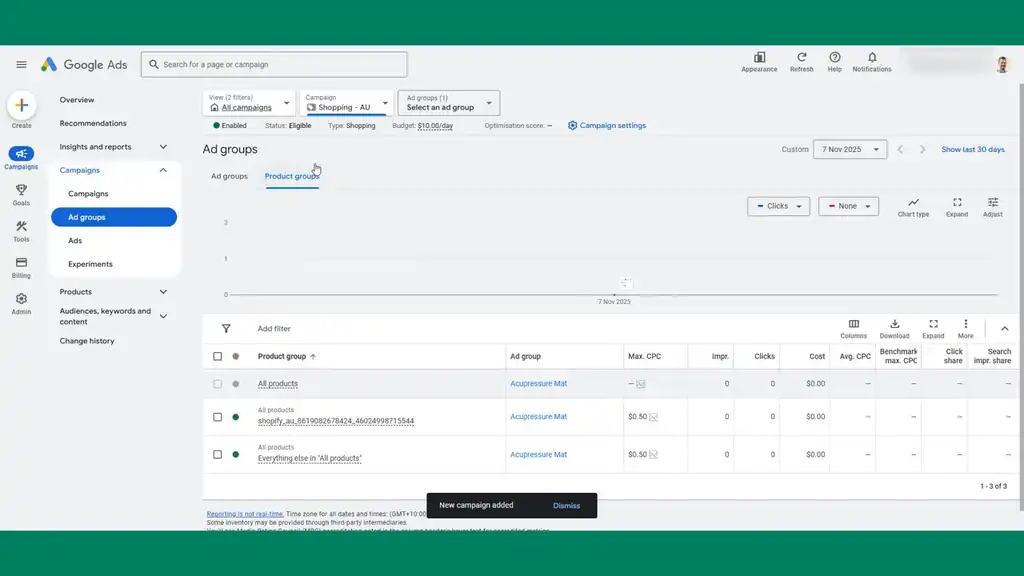
Ad Group Setup and Publishing
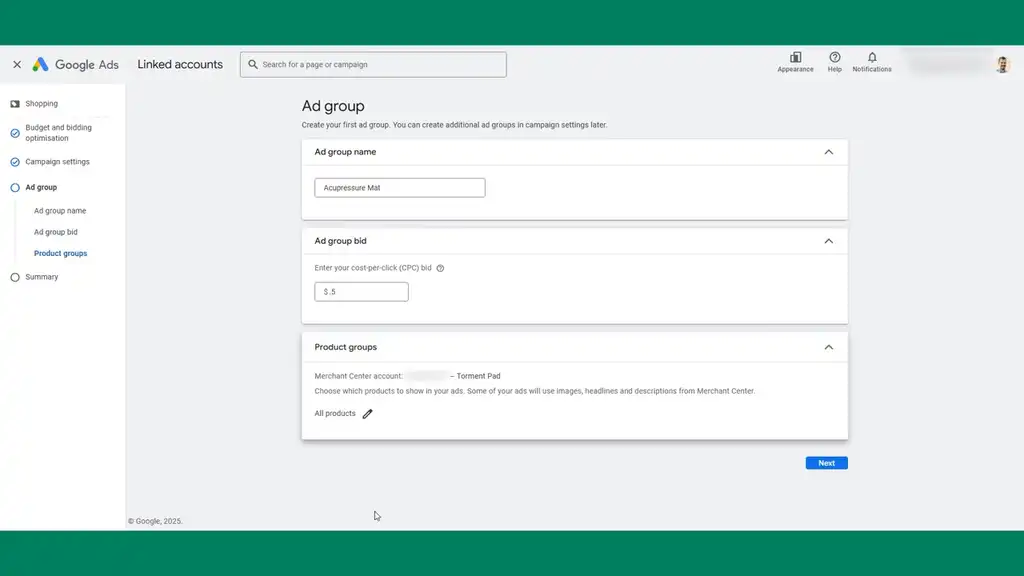
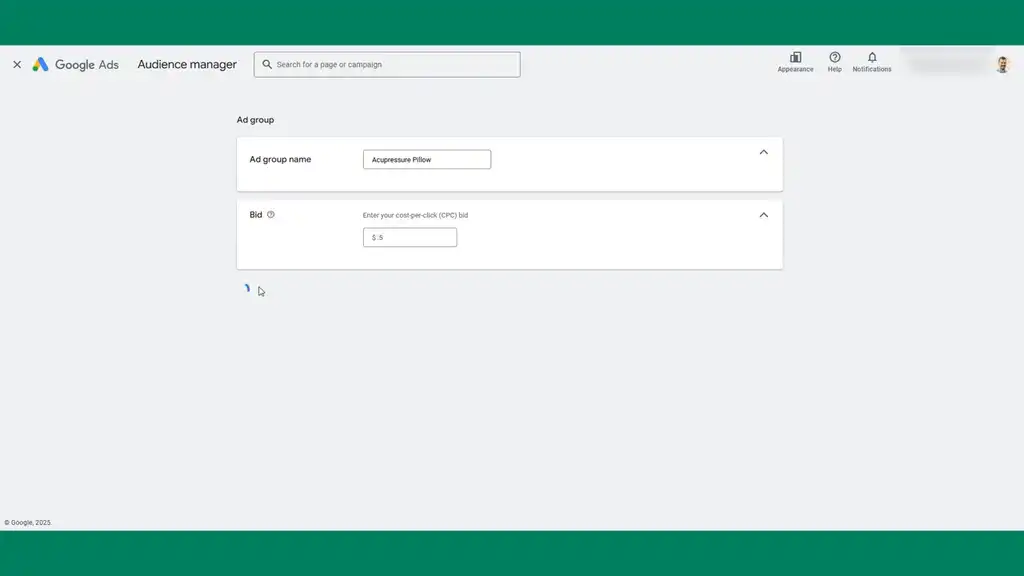
For the ad group, we’ve got three products so we’re going to keep it simple and build our ad group names for each product. For a starting bid, anywhere between 50 cents and a dollar just to get you started. Set the product group by item ID. Publish the campaign.
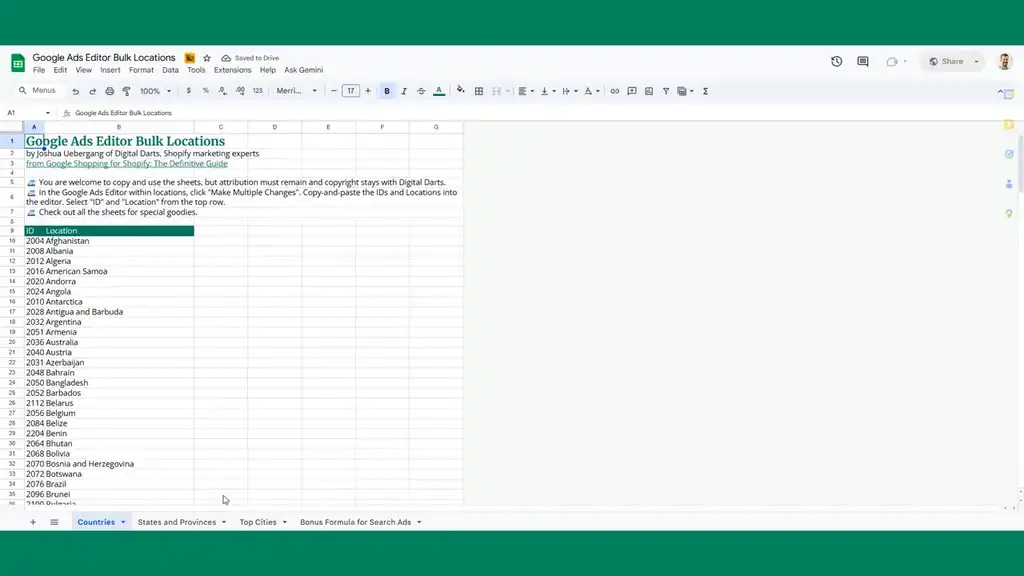
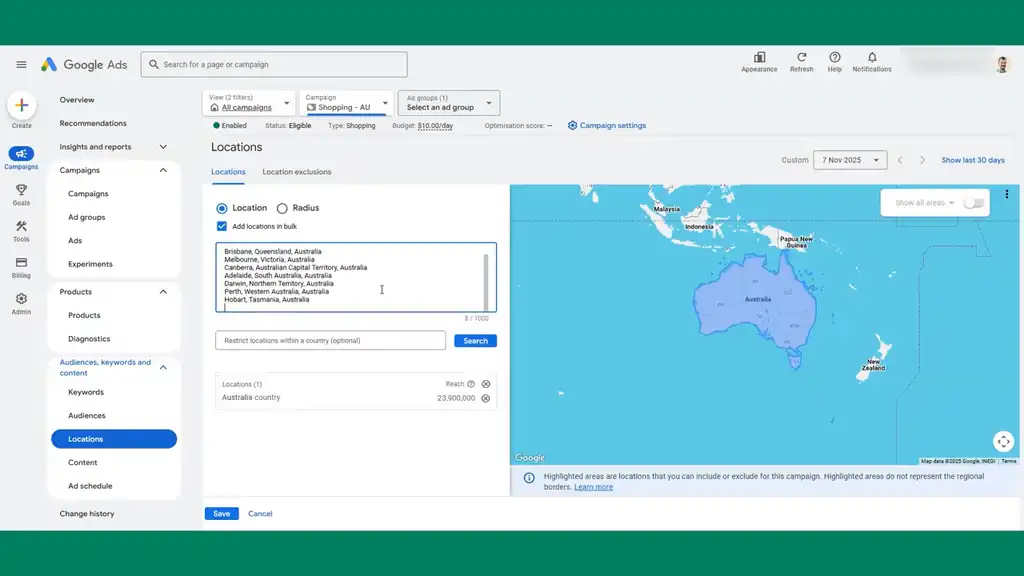
Adding Locations in Bulk
We want this campaign to be Australian only. Go to campaign settings, down to locations. I’ve built out a Google Sheet in my Google Shopping for Shopify Guide which you can download for free. Then optimize your Google Shopping, and search “bulk.” Copy the Australian cities and states into the campaign by adding locations in bulk. This will help performance by breaking up which states, countries, and cities actually perform, and you can set bid adjustments if you’re using a manual bid strategy.
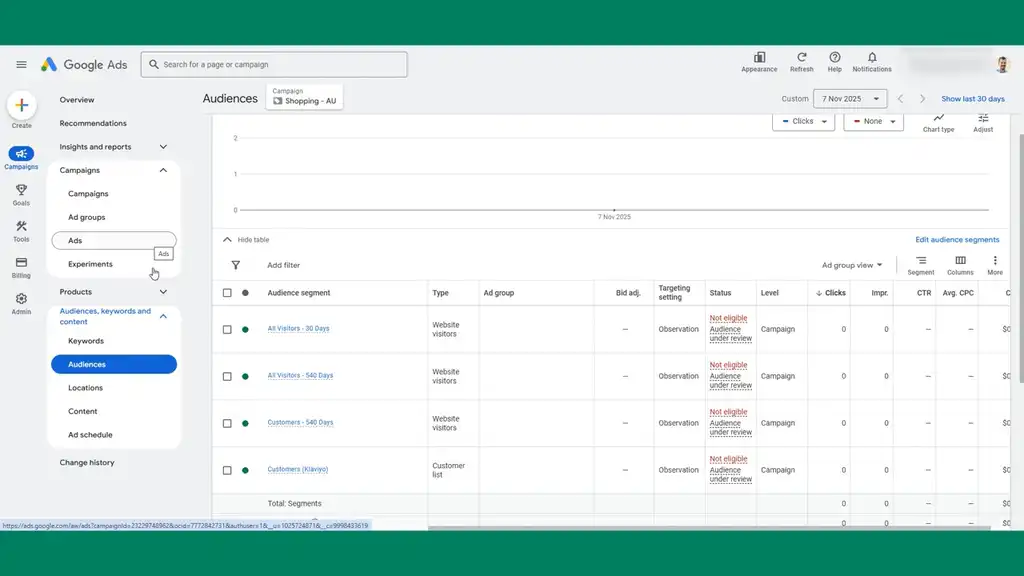
Audience Segments
In audience segments, it’s always worth adding in observation mode as this is just collecting data. You’re not actually influencing how your ads get shown. We’ll add our customer list that we’ve built up, and also build out some website visitor audiences.
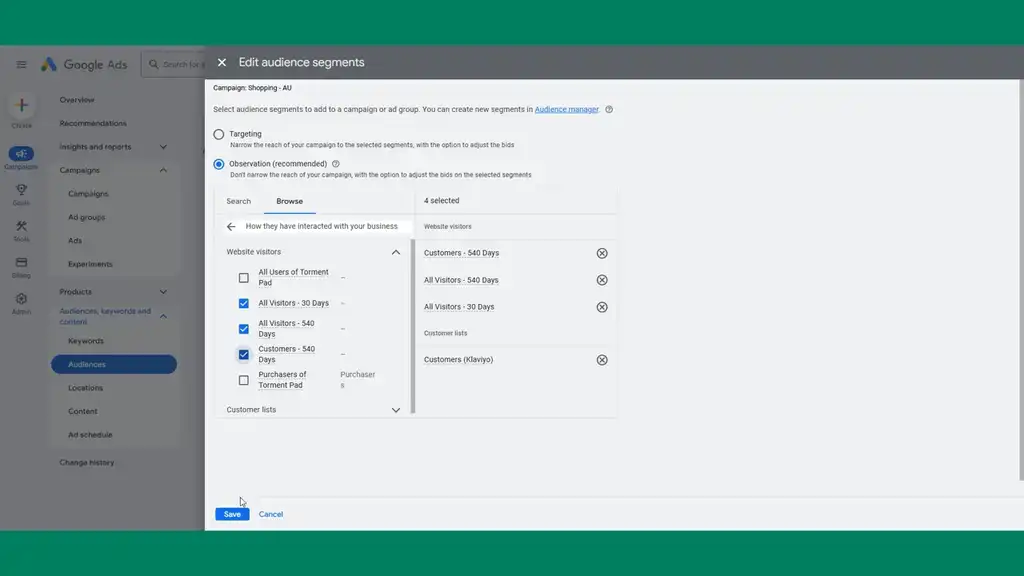
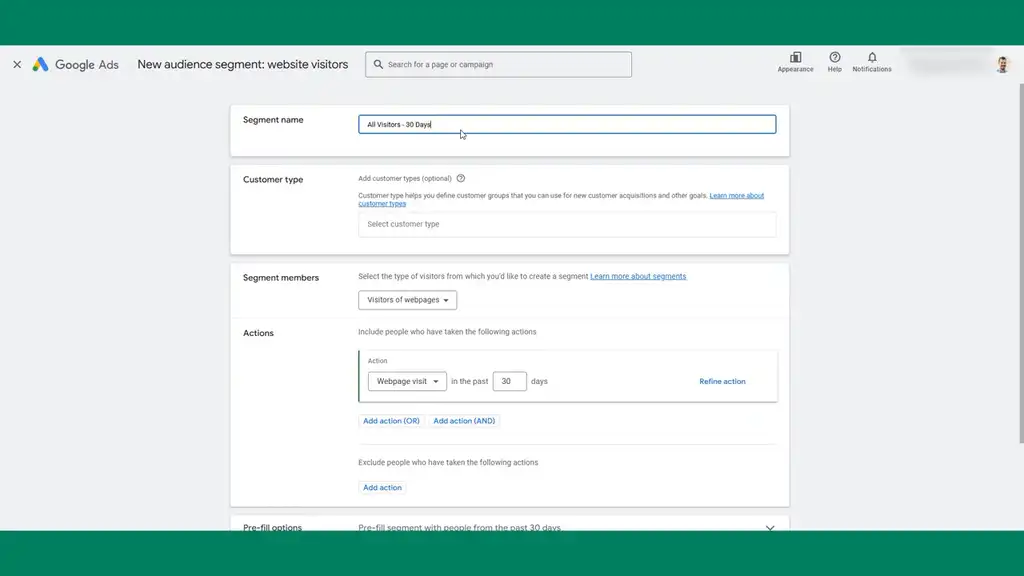
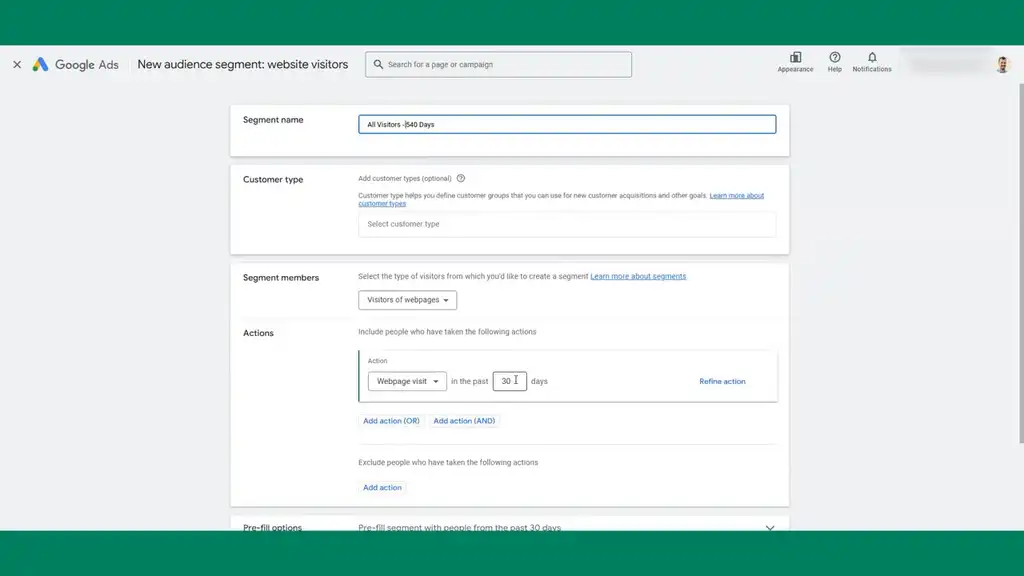
Go to Tools > Audience Manager and build some audiences. Create a 30-day visitors audience which is a good default for every Shopify brand. Then create a 540-day visitor segment, which is the maximum timeline, to collect as much data as possible within the platform.
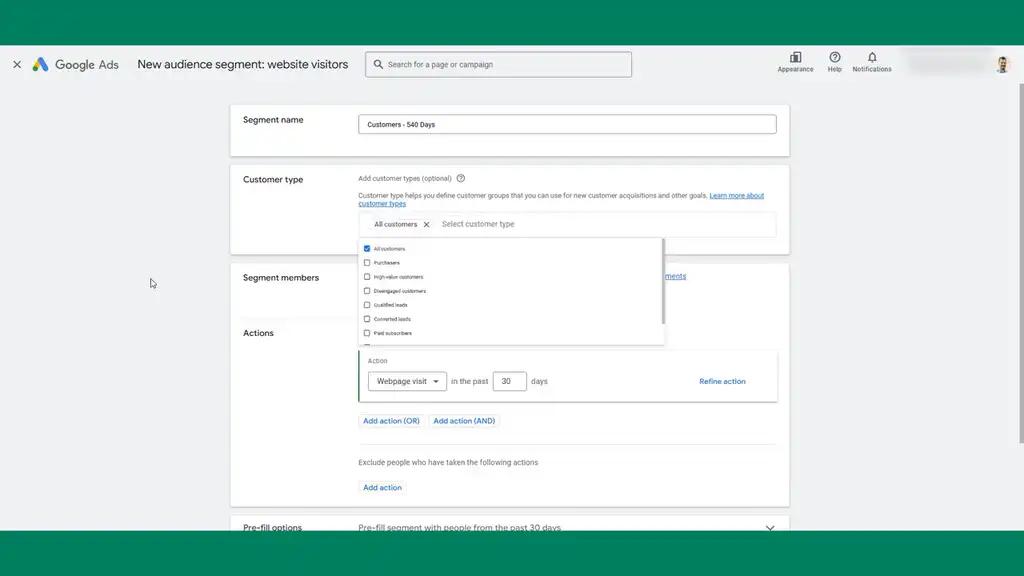
Then create a 540-day customer segment as well. This will provide another source of collection for customer data which we can overlay in the campaign. The page URL will match Shopify’s checkout.
Go down to audiences and edit audience segments. Add these audiences: 30 days, 540 days, and 540-day customers. These are good defaults for Shopify brands. While using a manual bid strategy, if you’ve got repeat customers, you can easily set a bid adjustment to bid more aggressively to get these people back. Customer lists will often justify bidding 100% more to make sure you secure that customer.
Building Out Ad Groups for Each Product
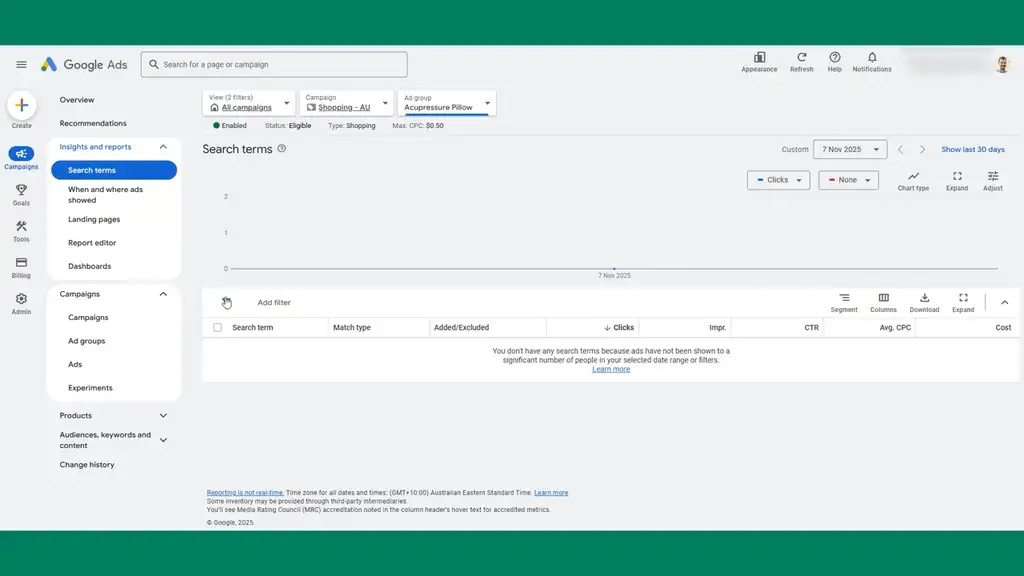
Now build out the ad groups for the other products to have a comprehensive structure. Create a new ad group, set the bid, then select the item ID for the pillow and exclude the other products. By excluding other products, you’ll be able to jump into the search terms report as campaigns run and see that in this ad group of acupressure pillow, you’ll see the search terms and that will help you channel queries where you want them. If a mat term comes up in the pillow ad group, you can add a negative keyword right there at the ad group level.
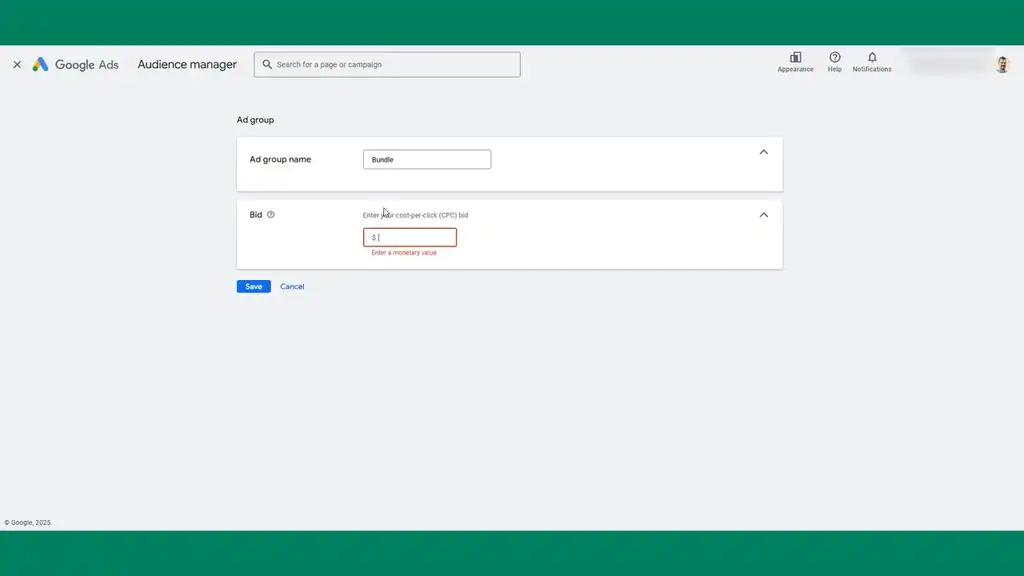
The last ad group to set up is for the bundle. Given it’s a higher AOV, you can set a slightly higher bid for that.
With this shopping campaign set up, we’ve got a solid structure: audiences collecting data, good settings, and three different products being advertised with segmentation that allows for search term optimization. If you make a bad framework, the whole foundation for future work is difficult. This structure gives you a good framework to make future optimizations on.

Column Structure for Reporting
Finally, what’s worth setting up now in your build is the column structure. As a quick guideline for shopping: impressions, clicks, CTR, cost per click, cost. Modify the columns and name the set. You can pause the video and work through each one, or come back when you need it. Having this column structure lets you swap between each column set as needed and will help your analysis for each campaign type enormously as you can see at a glance what each column is.
If you don’t want to do all of what I showed you, and you need someone to regularly manage your account, my team at Digital Darts can do all of this for you. We handle everything with your Google Ads to grow your store.
We treat every dollar of your ad spend like it’s our own. That means no lazy automations, no bloated campaigns, and no “hope it works” strategy. Just clear, data-backed decisions that protect your margins.
If you want to finally unlock hidden profit you’re probably leaving on the table, apply to work with us. After working with Shopify brands for over a decade managing hundreds of millions in spend, there’s no hope with what works. We know what works and do it all for you.
What You Should Do Next...
Get More Free Tactics
Subscribe for tutorials and tactics to grow your Shopify store. You'll also immediately download the 30+ page deck "4 Rules of Store Growth: To Sell More on Shopify, Escape Work You Hate, Boost Profit, and Have a Business You're Proud Of".
Work With Us
We partner with a small number of Shopify stores each quarter to scale paid ads, SEO, and conversion rate. If you're serious about growth, apply below. If it's a fit, we'll schedule a call to map out your plan.
APPLY TO WORK WITH US
